Personalizing the kindle cover

So how to personalize your new Kindle Cover? It’s very easy! Let’s get started!
Important:
If something goes wrong – don’t panic! You can always move one step backwards by pressing Ctrl (Command) +Z. If you need to move back more than just one step, it’s also ok. Just click Ctrl (Command) +Alt +Z as many times as you need.
Step 1: Open Adobe Photoshop. (Check how to install Photoshop)
Step 2: Click File->Open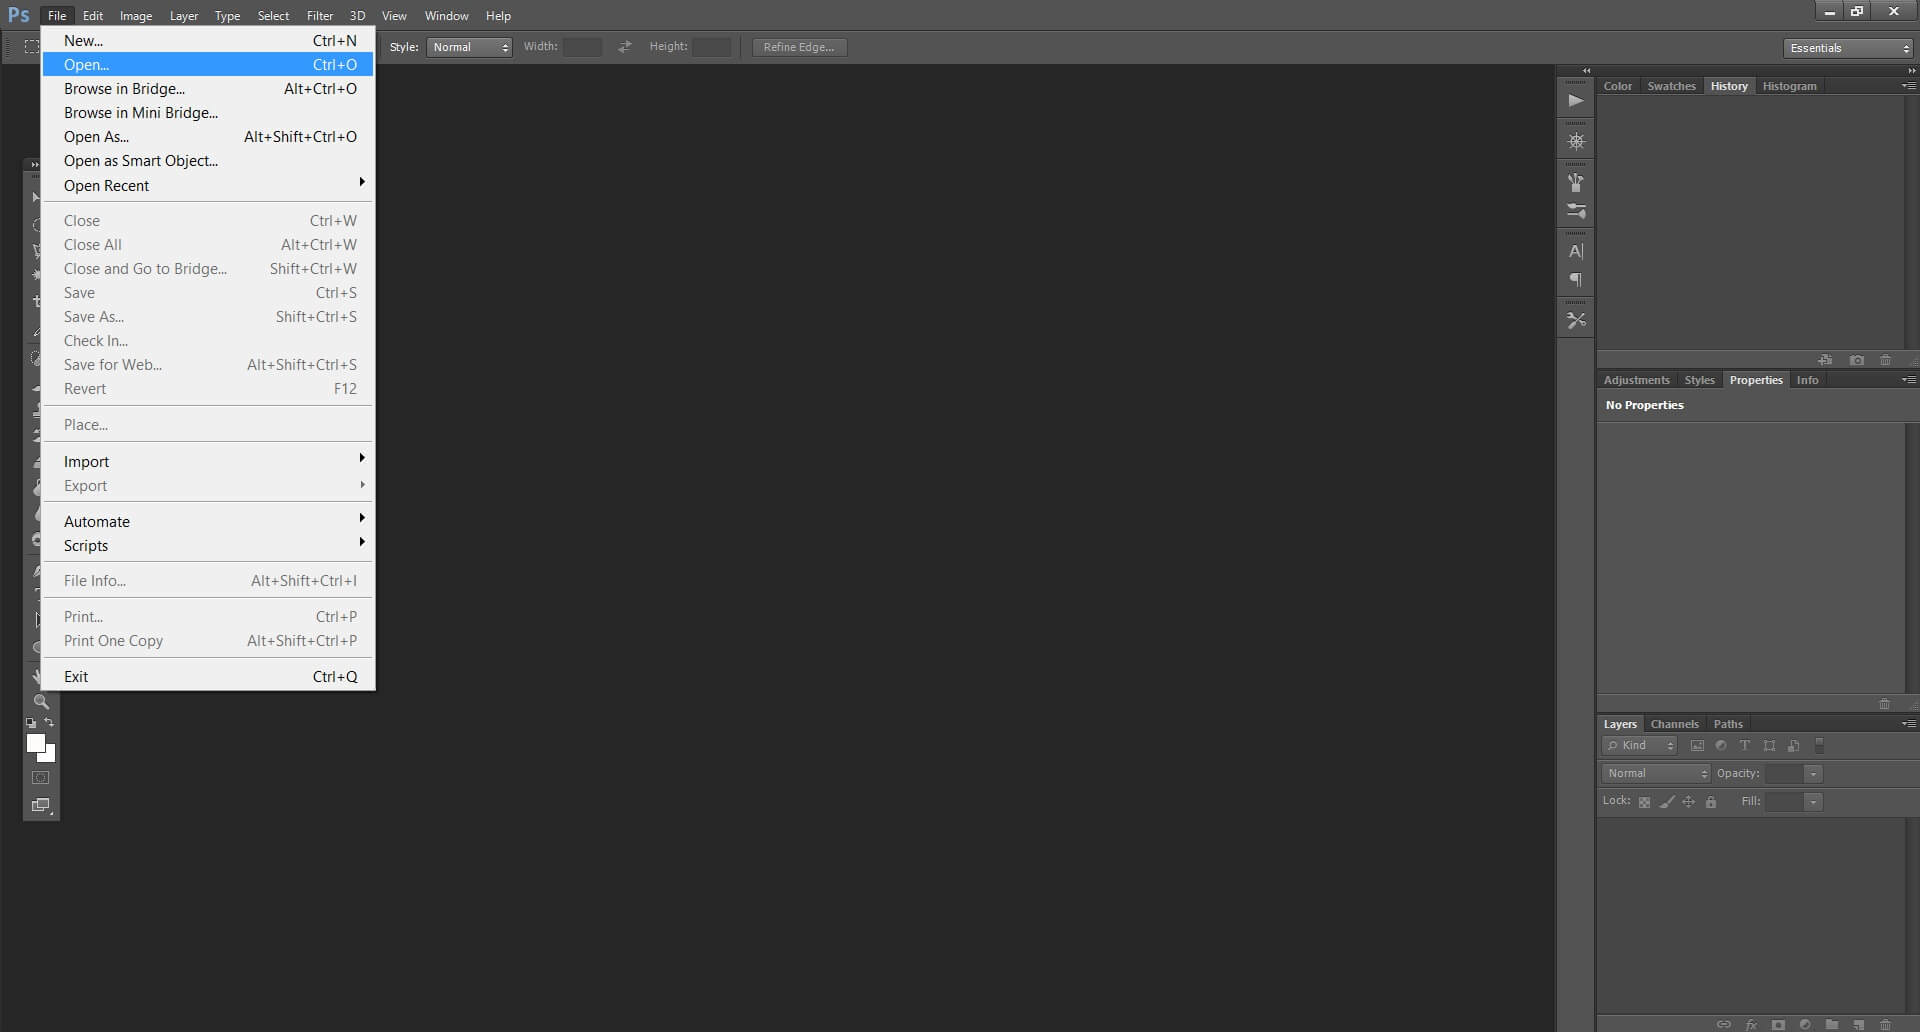
Step 3: Choose the psd file of your cover and click Open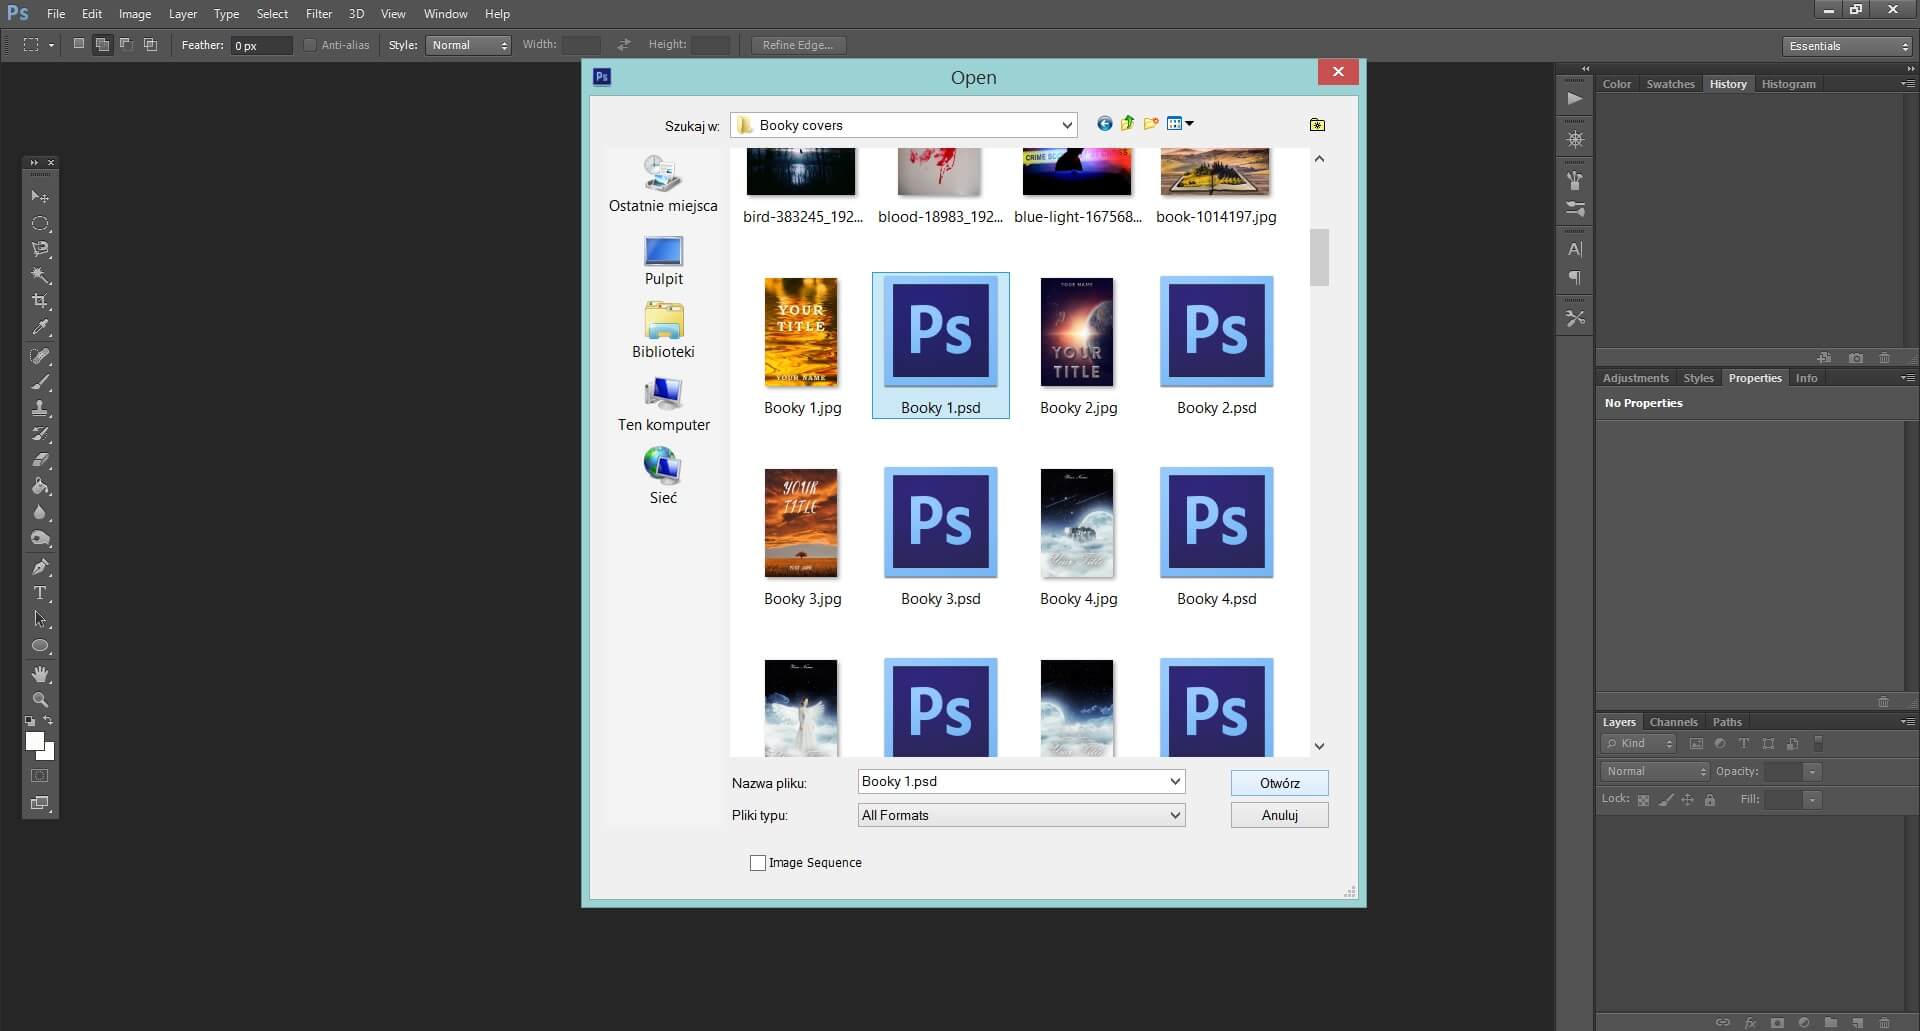
Step 4: Double click on the T standing next to the ‘Your title’ layer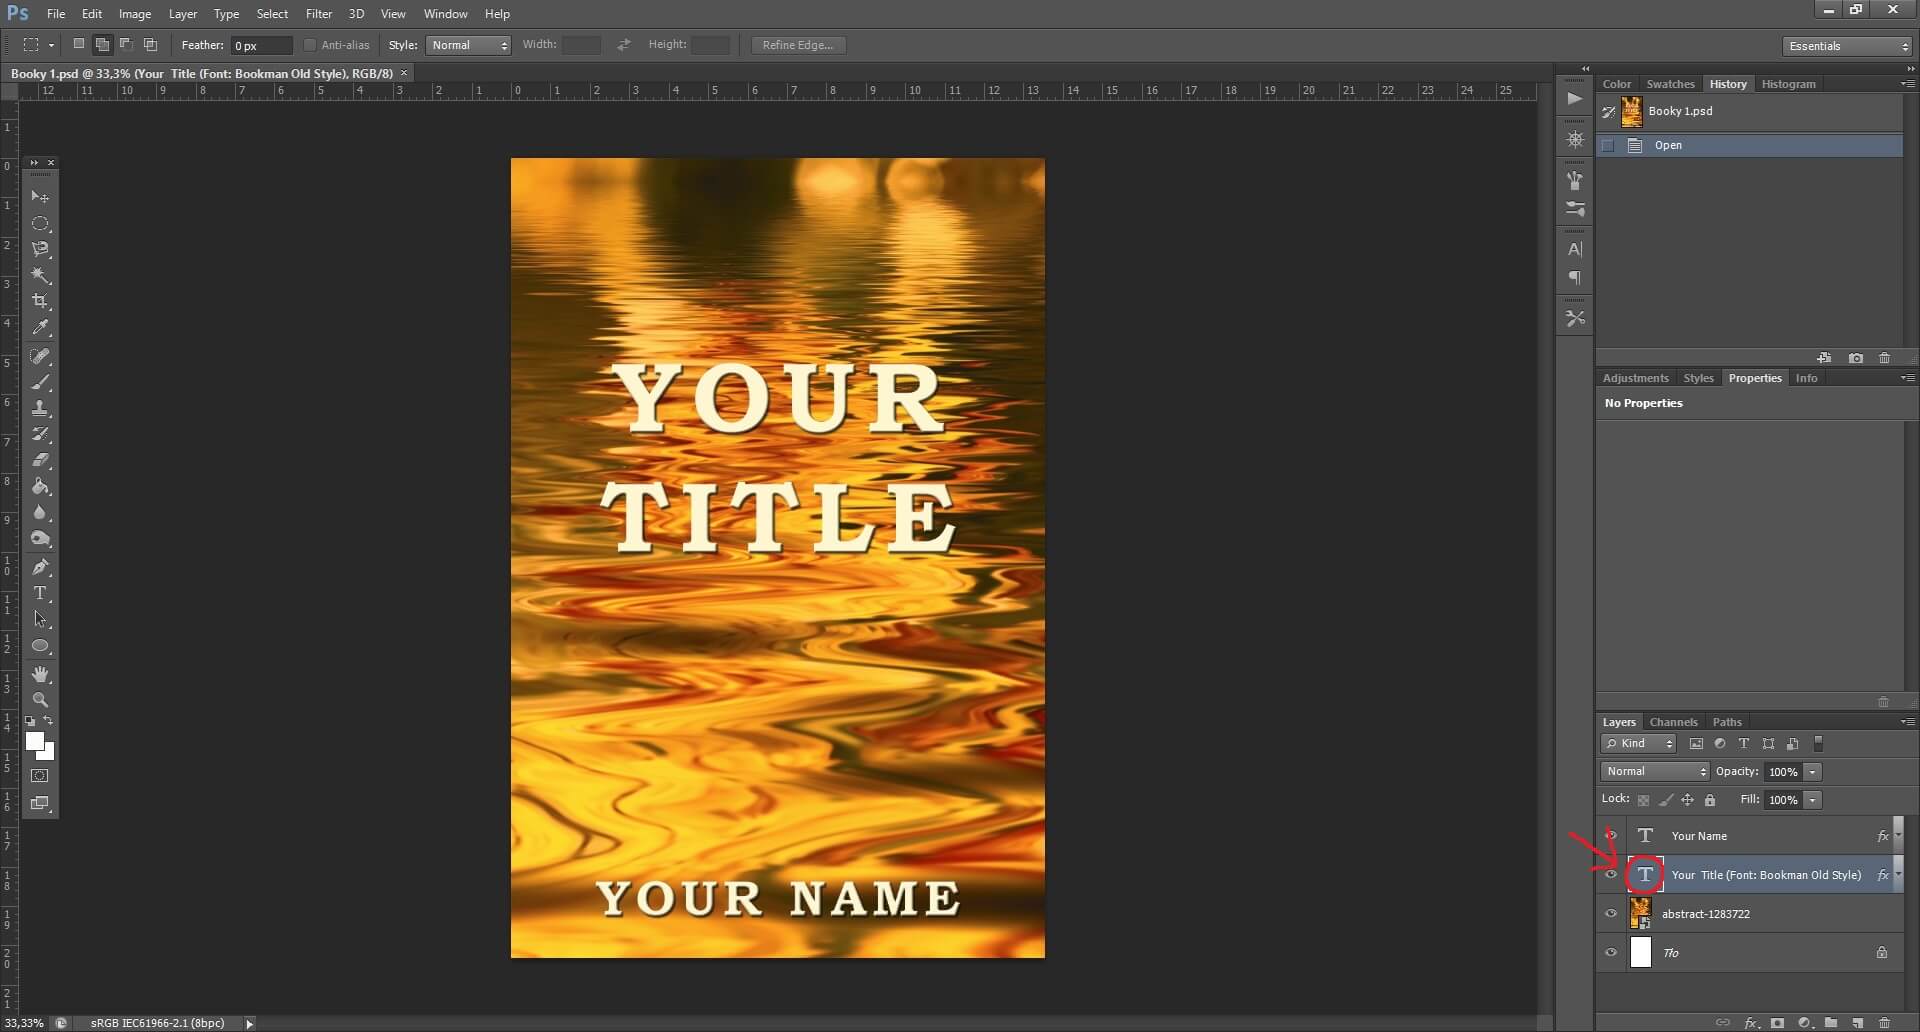
That’s what you get.
Step 5: Write your title
Step 6: In the top left panel you can edit your text: you can change the font, size, style and color.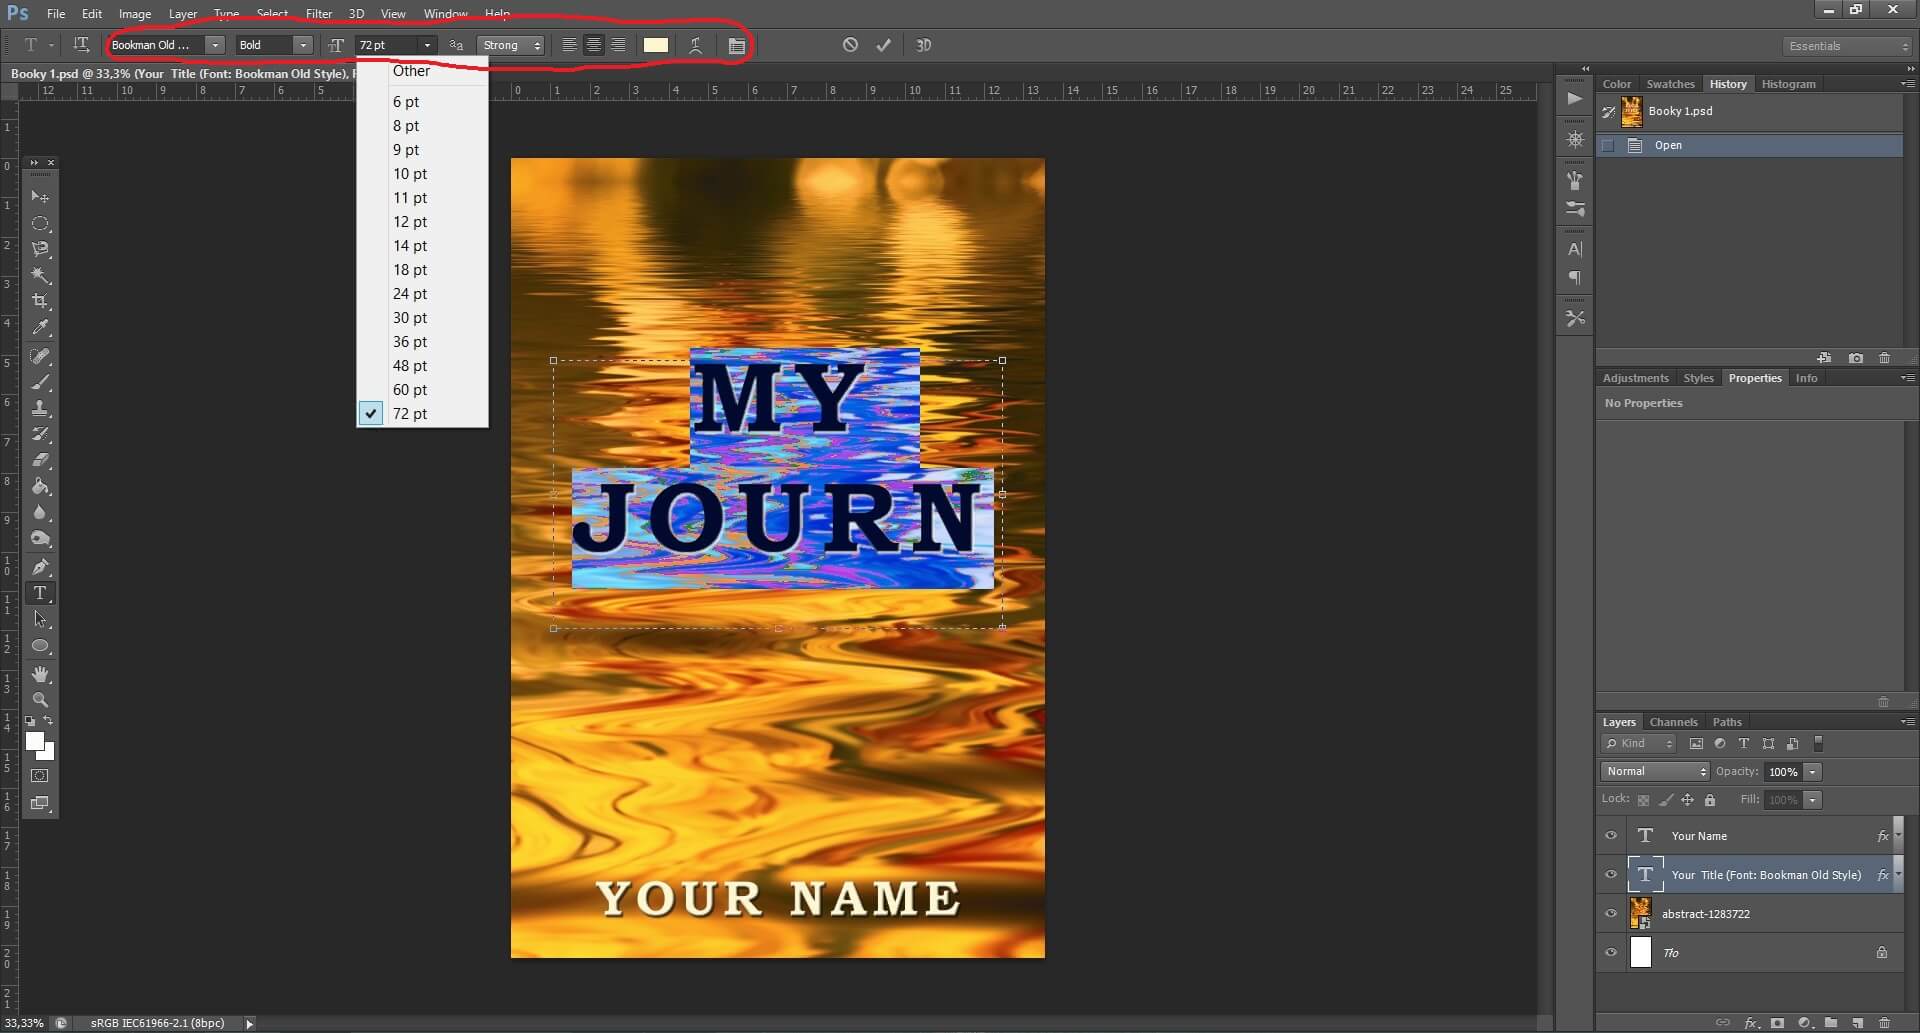
Clicking here you get even more options such as the distance between the letters and lines.
Step 7: Write your name repeating the steps with the layer ‘Your Name’
Step 8: If you want to move the title or your name, click on the arrow symbol on the left panel and make sure to click on the layer that you want to move (on the right side)
Step 9: When your cover is done click File-> Save As
Step 10: Choose the folder where you want to save your cover, choose the name for the file and from the list Format choose JPEG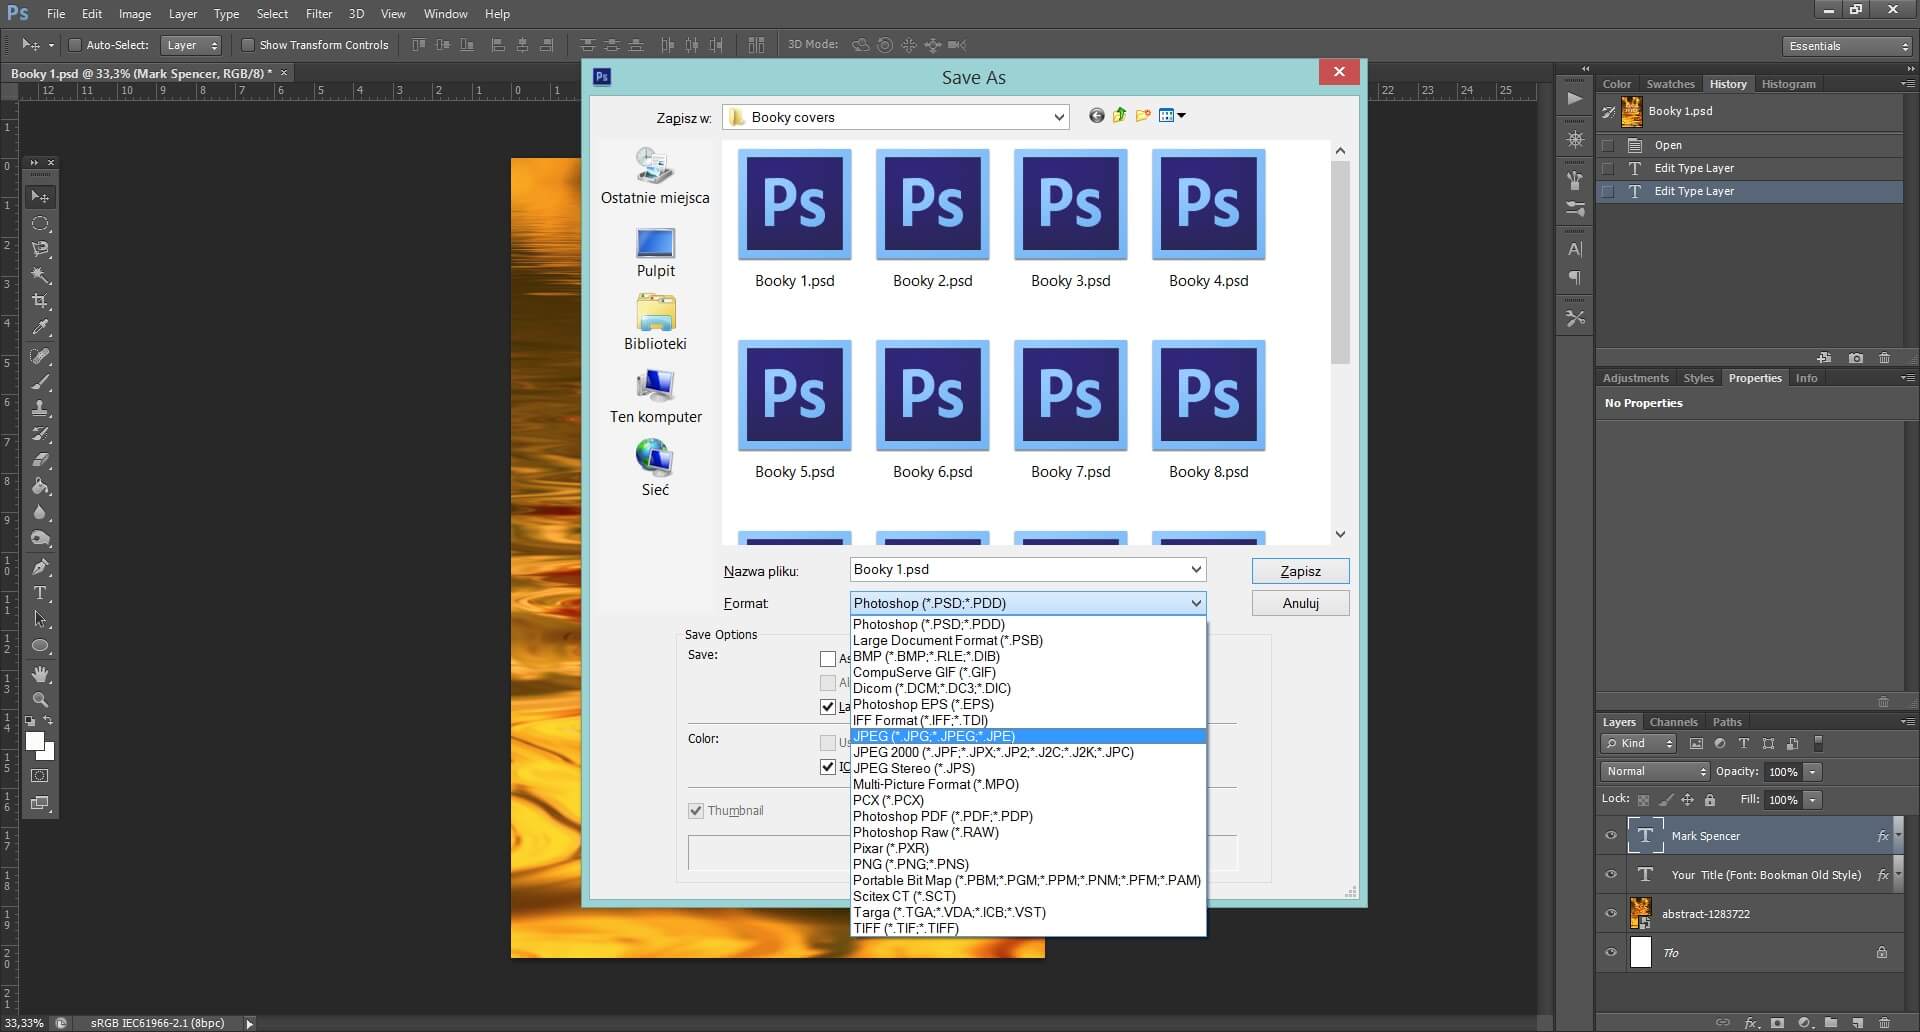
And that’s it! Your perfect kindle cover is ready!
You may find it interesting:
Change the color of your kindle cover
What if you don’t have the font installed?
If you have any questions or problems contact me via the contact form or let me know in the comments. I’ll do my best to help!
