Easily create a fan graphic

Creating a graphic with your book is one of the best ways to promote it. You can create one very easily using Photoshop. Here’s how:
Attention! If you make any mistake, don’t panic. You can always make a step back by pressing CTRL/Command + Z. If you want to undo more than one step press Ctrl/Command + Alt + Z as many times as you need.
Step 1: Open Photoshop. If you don’t have it, check How to get Photoshop?
Step 2: Choose a picture that you want to use as a background of your graphic. It should be quite plain and fit your story. You can look for it on pexels.com. I chose this one: https://www.pexels.com/photo/sky-night-space-galaxy-6656/
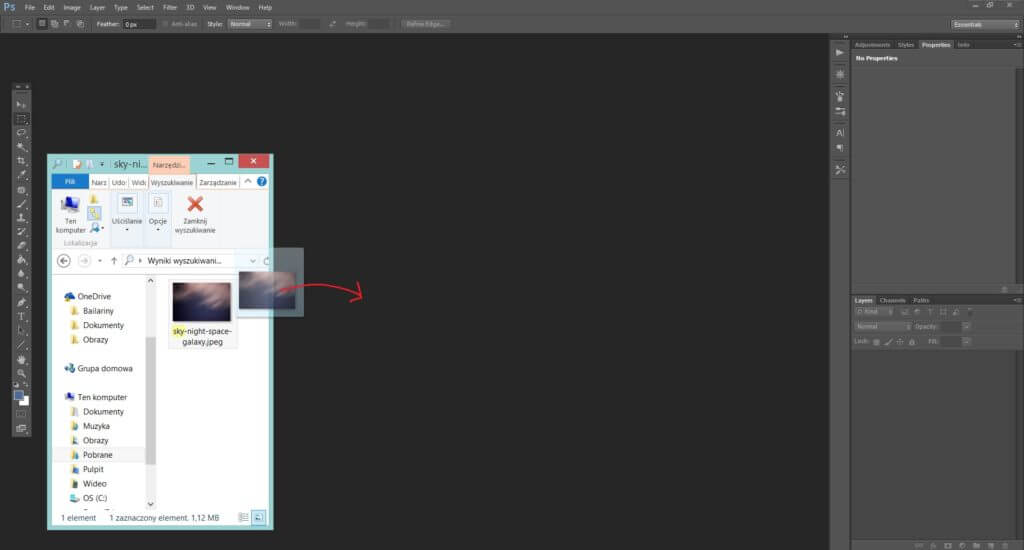
Step 3: When you have the picture, simply place it in your Photoshop window.
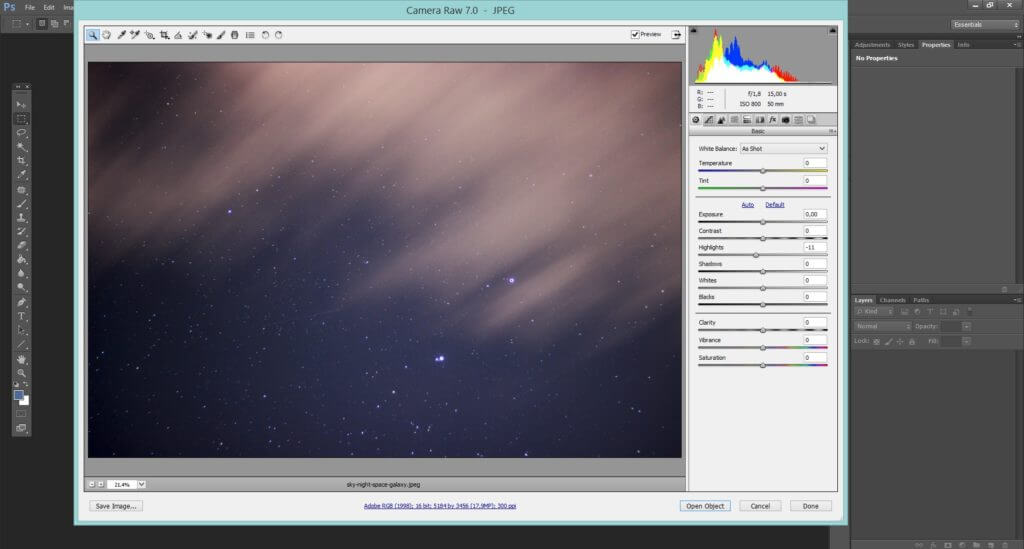
 Step 4: Some of you may seems this window. It depends on the setting of Photoshop. Just click OK or Open Object. If you don’t see it, just follow the next steps.
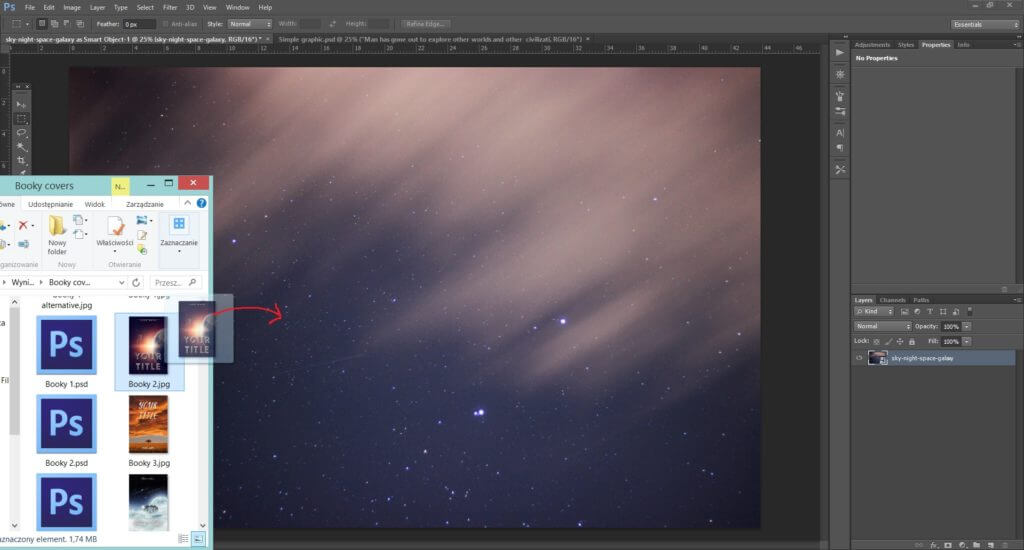
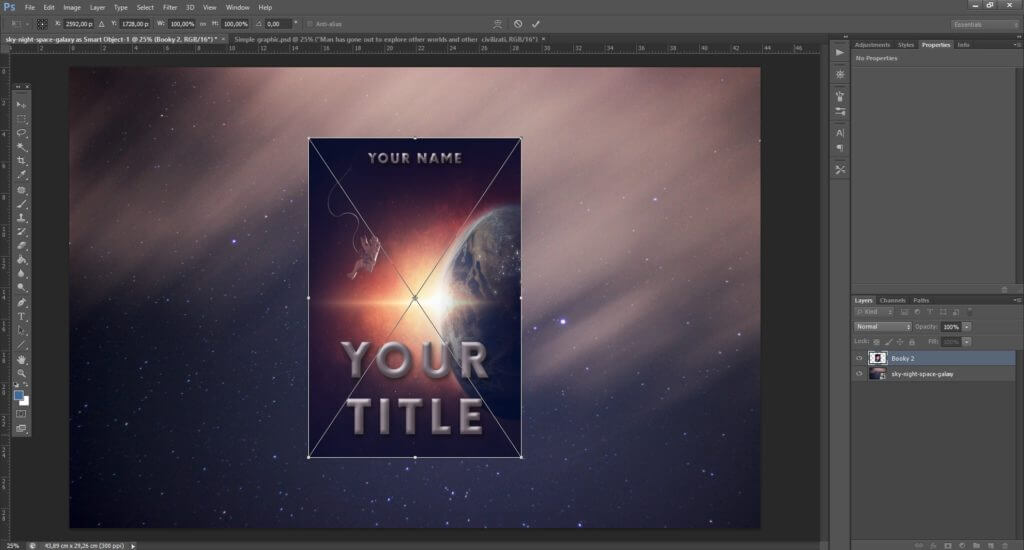
 Step 5: We have the background, now we have to add the other elements. Let’s start with the cover of your book. Just move it into Photoshop like you did with the background picture.
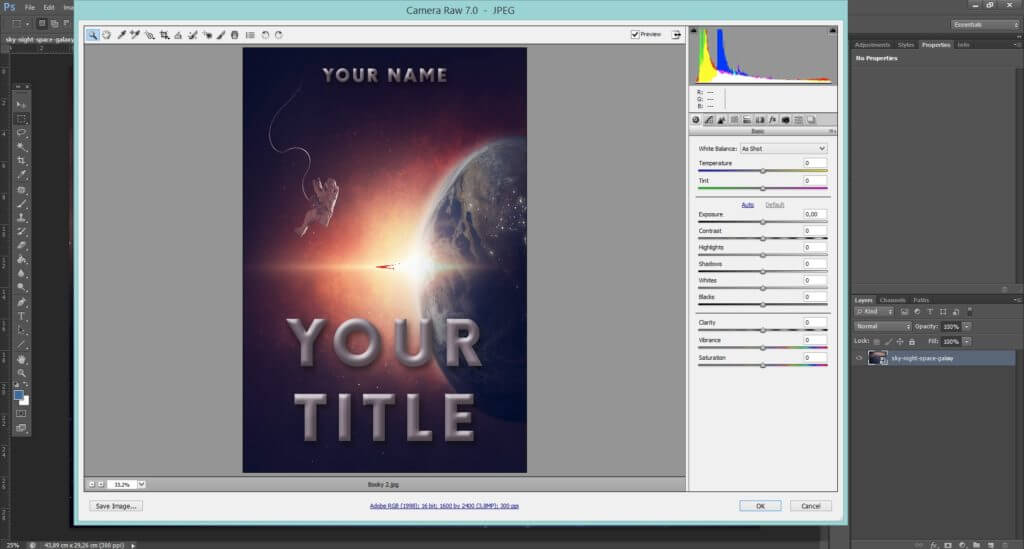
 Step 6: Again, if you see this window just press ENTER or click OK, if you don’t, don’t worry.
Step 7: That’s what you get. Clicking on the small squares on the corners of your cover you can change its size. To keep the proportions, simply press SHIFT while doing it. When you’re done, just press ENTER. You can always edit the size by pressing CTRL (Command) + T. Just make sure that you selected the layer of your cover (the Layers panel is on the right).
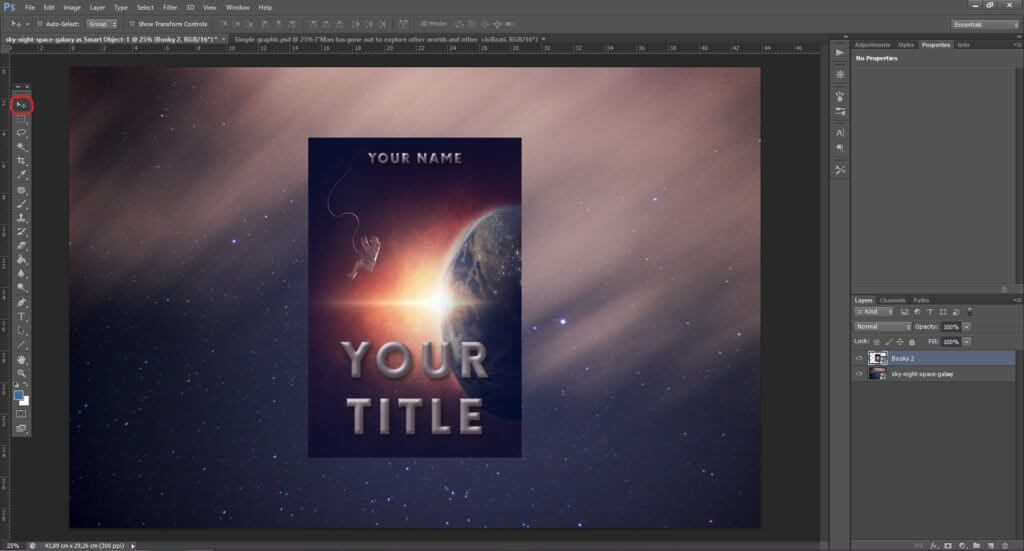
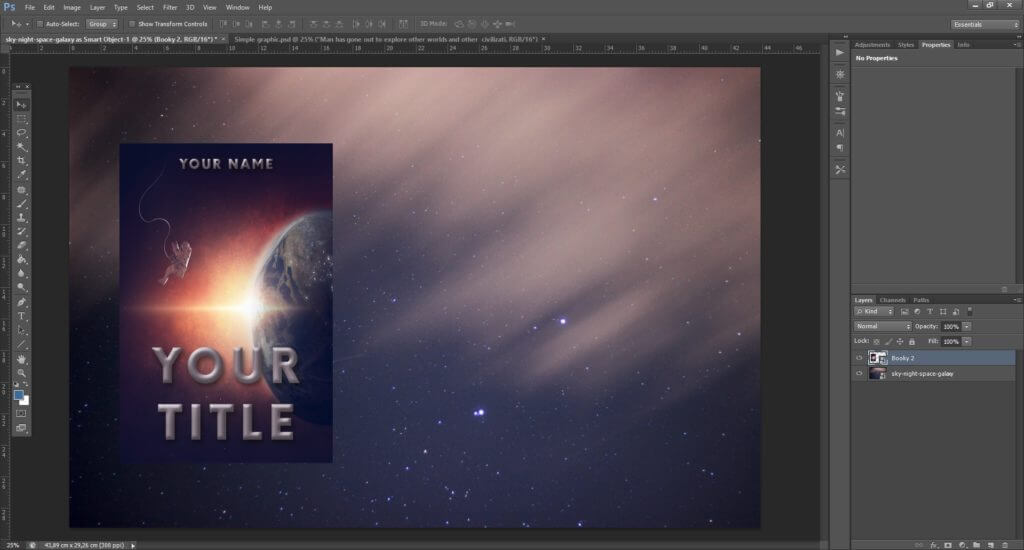
Step 8: By clicking on the arrow tool in the top left you can move your cover and place it wherever you like it. Move it to one of the sides to make some space for the text.
Step 9: That’s what we have so far. Let’s add an amazing quote from your book that will catch the attention of your readers.
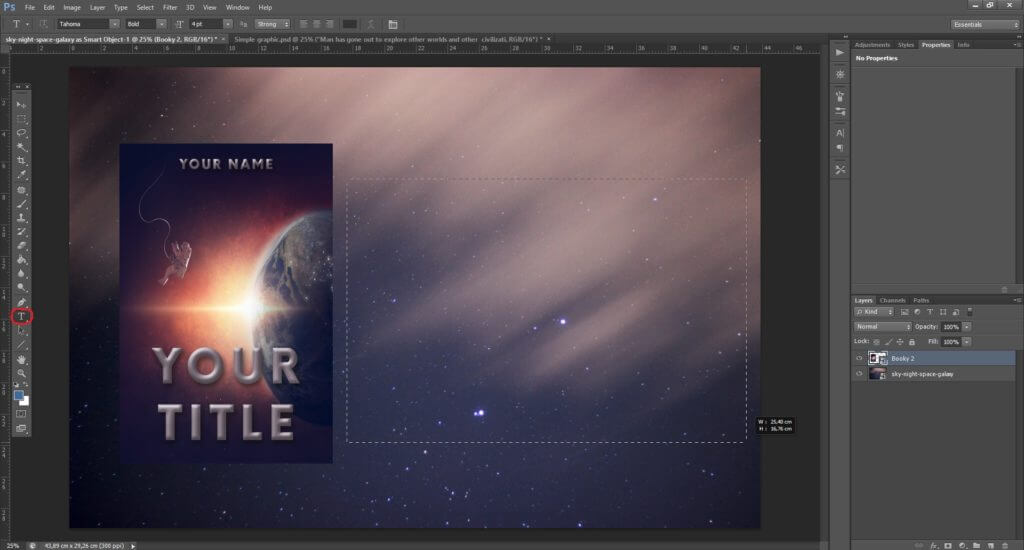
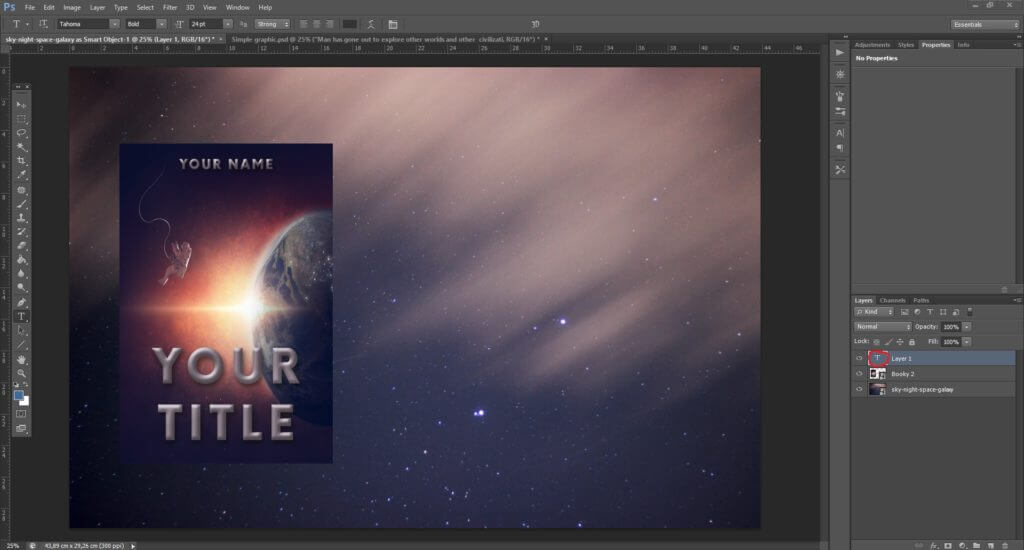
Step 10: To do so click on the T icon in the panel on the left. This is the TEXT tool. By keeping the left mouse button closed select a space where you want your text to appear.
If the text field disactivates, you can always edit it by double-clicking on the T icon in the layers panel.
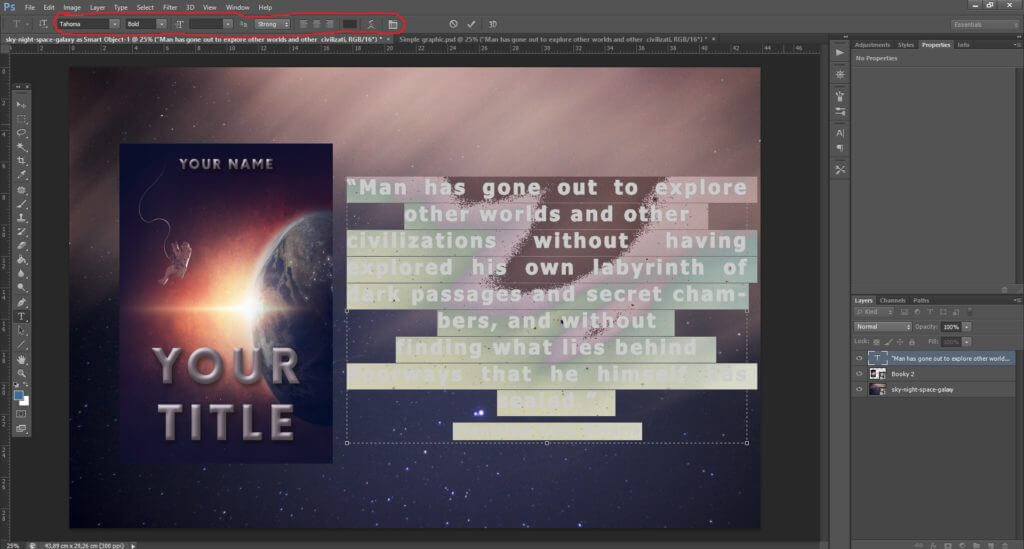
Step 11: When your text field is active, paste your quote there. (CTRL/Command + C copy the selected text, CTRL/Command + V paste it). To edit it, it has to be selected. If it’s not, press CTRL/Command + A. On the top you can see the panel for text editing. You can change the font, the size of the text, color etc.
Attention! If the text disappears or you can see just a part of it, it means the font is too big. Press CTRL (Command) + A and change the size.
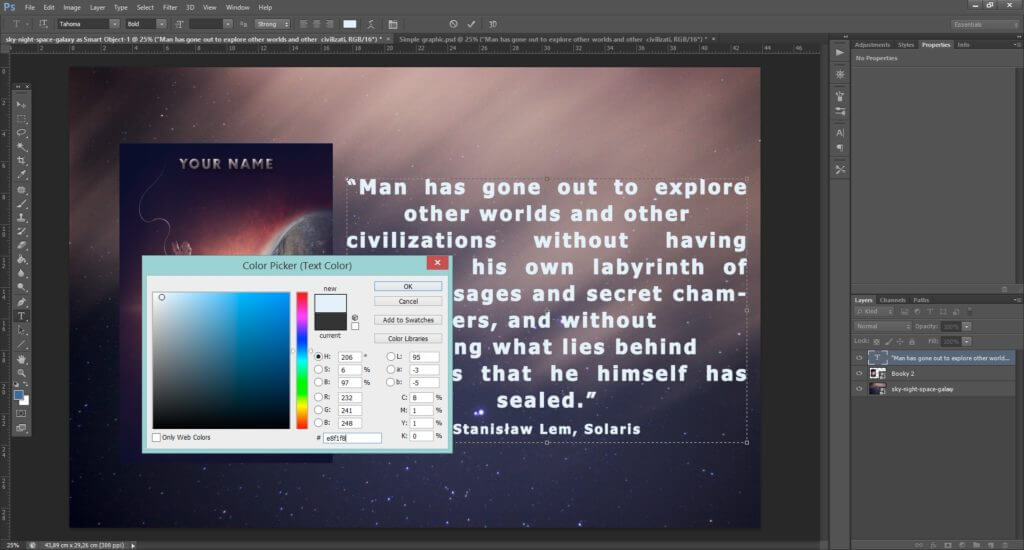
For example, this is the window of changing color. If you open it and later click somewhere on the image, Photoshop will automatically choose the color you clicked on. You can also choose it manually.
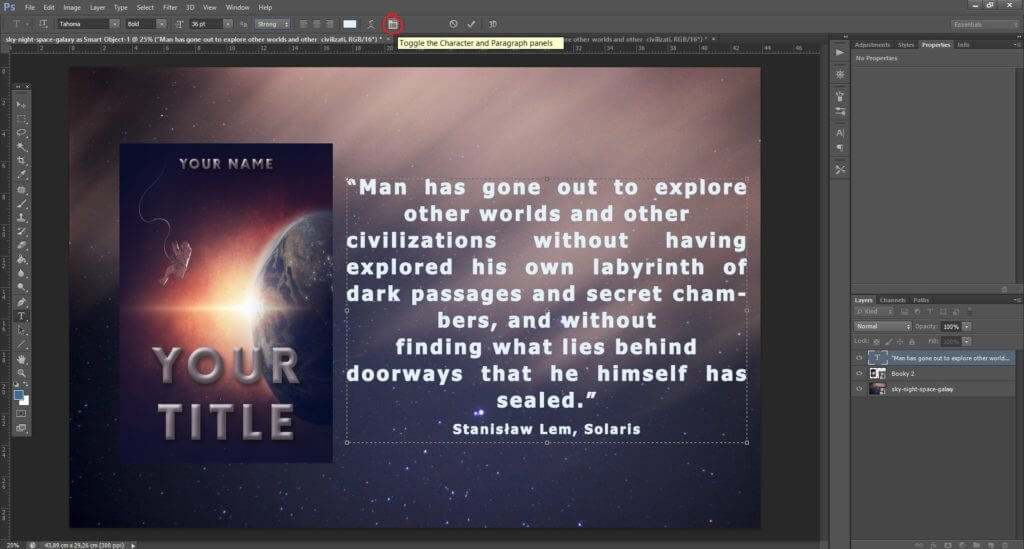
Step 12: This button opens an additional panel with even more options of editing, such as paragraphs and space between the lines.
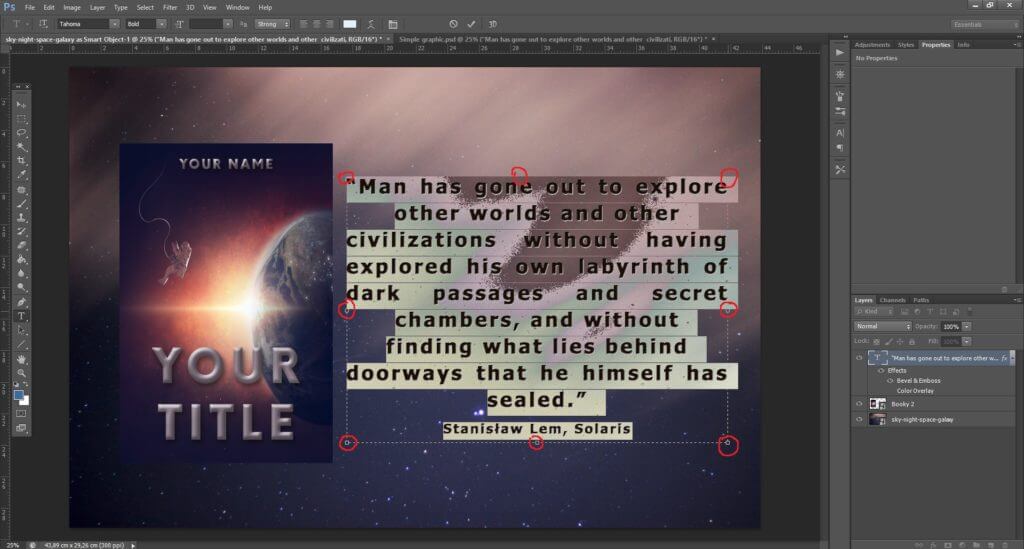
Step 13: You can always change the size of the text field by simply moving the small squares on its corners.
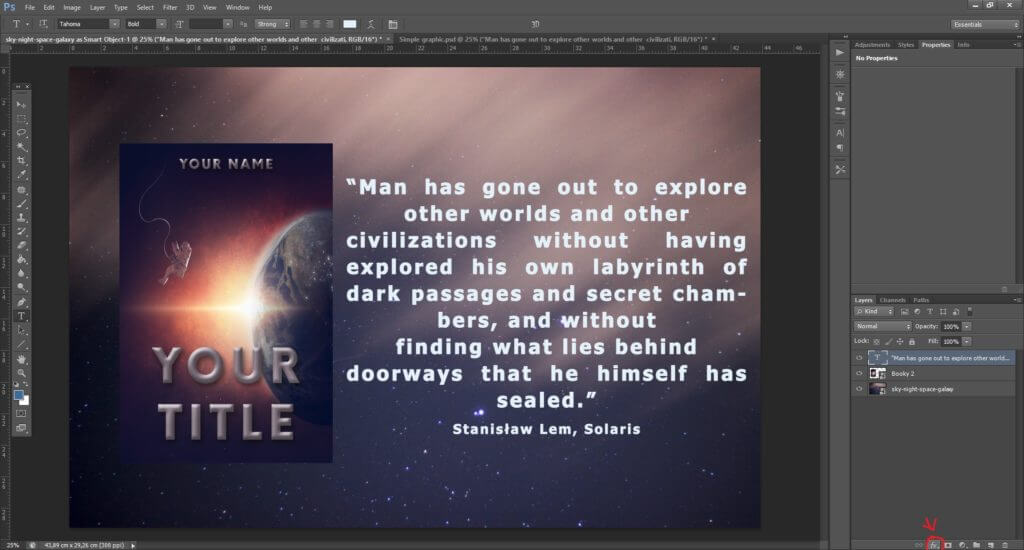
Step 14: We can add a few effects to make our text look better, such as shadow. To do so disactivate the text field, by clicking once on the text layer in the panel on the left. Now, click on the ‘fx’ button at the bottom.
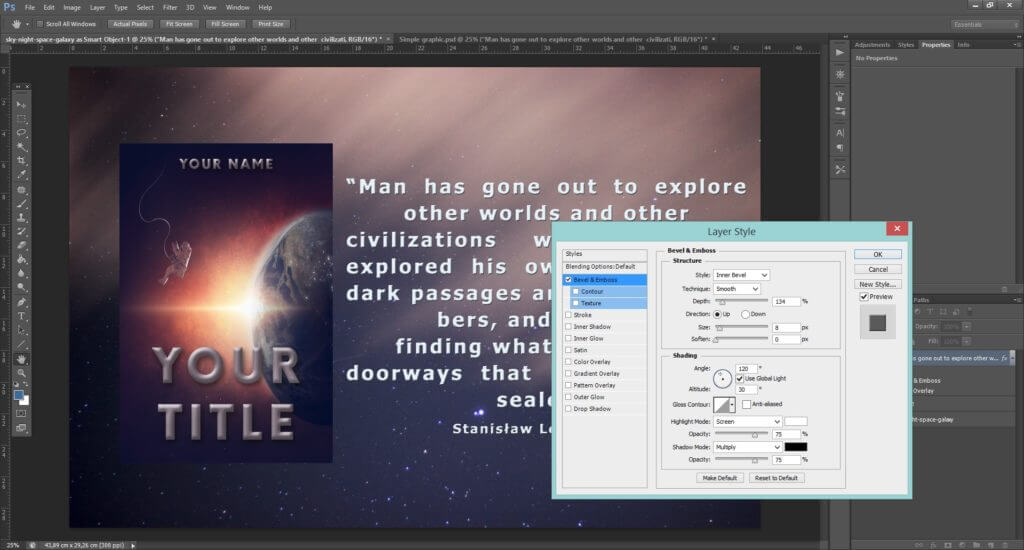
Step 15: There you can choose what effects to add. Each of them can be precisely edited. The most useful are ‘Shadow’ (to make the text more visible) and ‘Bevel & Emboss’ (to make it more three-dimensional). You can use the setting shown on the picture.
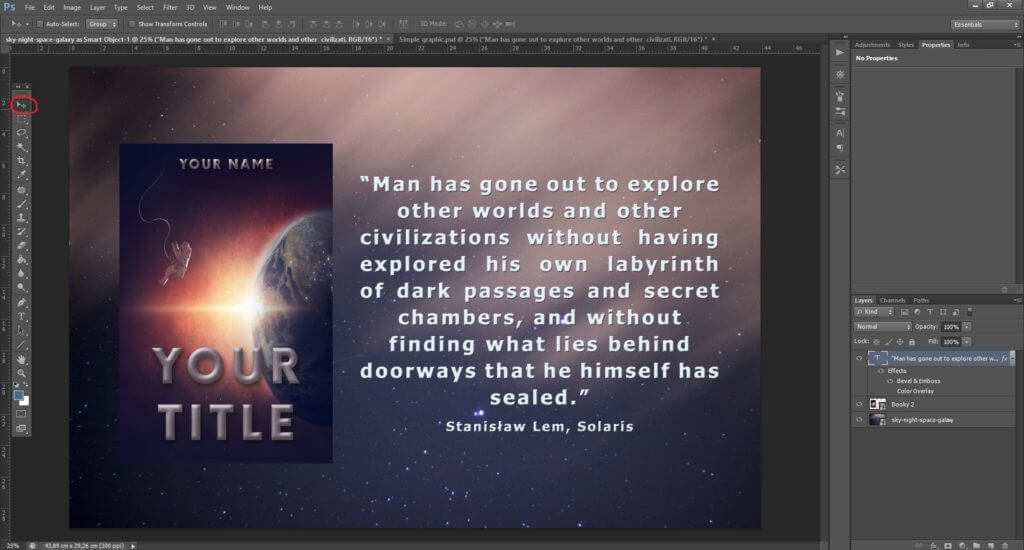
Step 16: By clicking at the arrow tool you can move all the elements of your picture. Just make sure to select the layer (panel on the right) that you want to move. Each of the elements is on a different layer. That is why Photoshop is so cool!
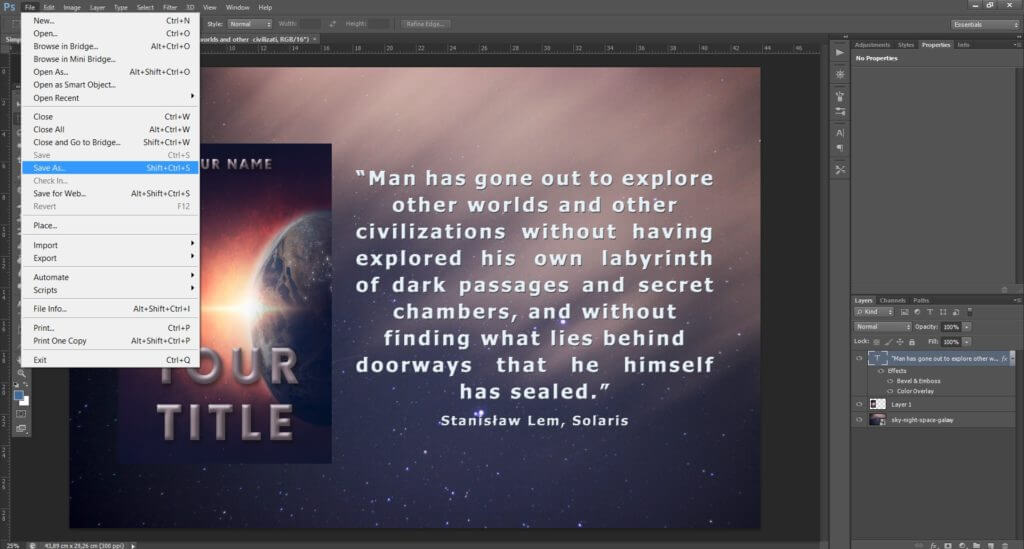
Step 17: Well done! Your graphic is ready! Now you have to save it. To do so just click File-> Save As. Choose a format you need and click SAVE. To save it as a picture choose .jpg. To be able to edit it in the future choose .psd – it is the Photoshop file containing all the layers you created.
And that’s it! Your graphic is ready! Isn’t it exciting? Of course, you can modify the graphic as you want. You can use only text or add more pictures, it’s up to you. Now you have all the tools needed.
When you’re done, please, paste your post contacting the graphic in the comments. I can’t wait to see it! Additionally, all Booky’s readers will find out about your book too!

One thought on “Easily create a fan graphic”