Changing the size of your cover
Changing the size of your cover
Your cover doesn’t fit the certain size? Don’t worry! It’s easy to change it. Ready? Let’s start!
Important:
If something goes wrong – don’t panic! You can always move one step backwards by pressing Ctrl (Command) +Z. If you need to move back more than just one step, it’s also ok. Just click Ctrl (Command) +Alt +Z as many times as you need.
Step 1: Open Photoshop
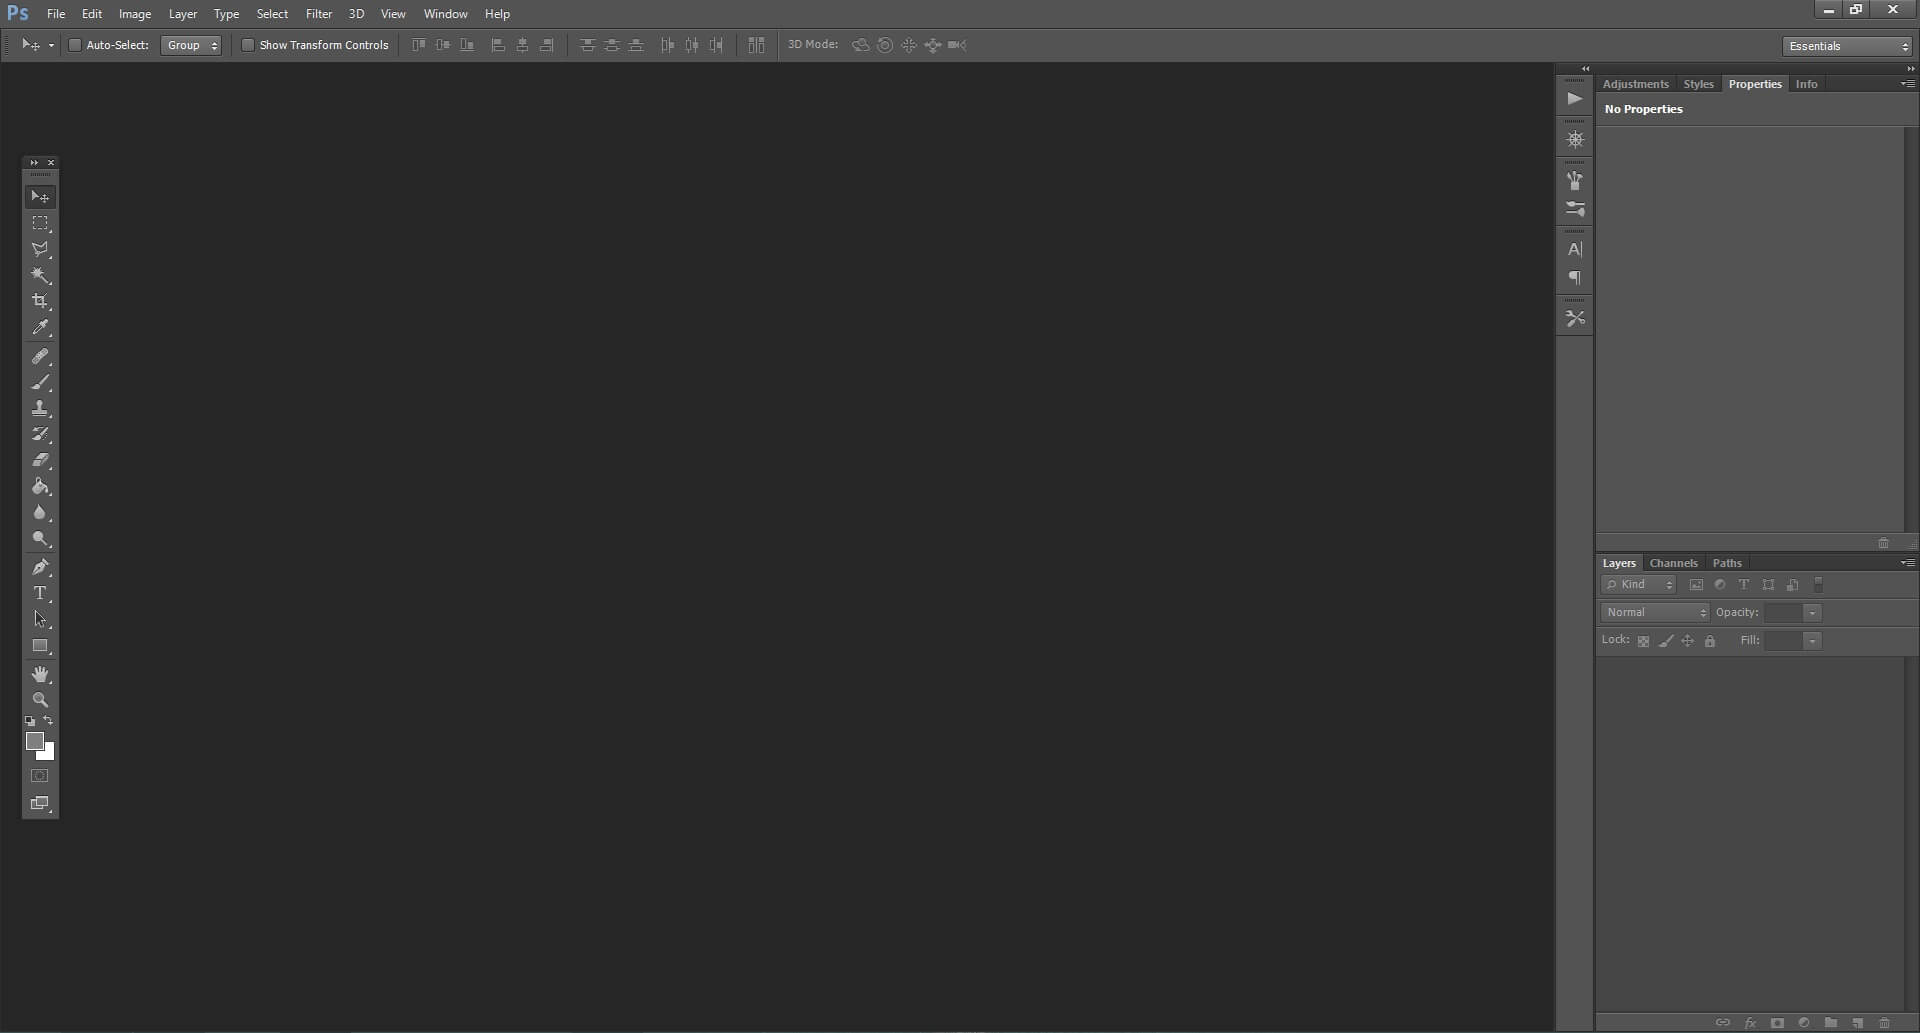
Step 2: Click File->Open
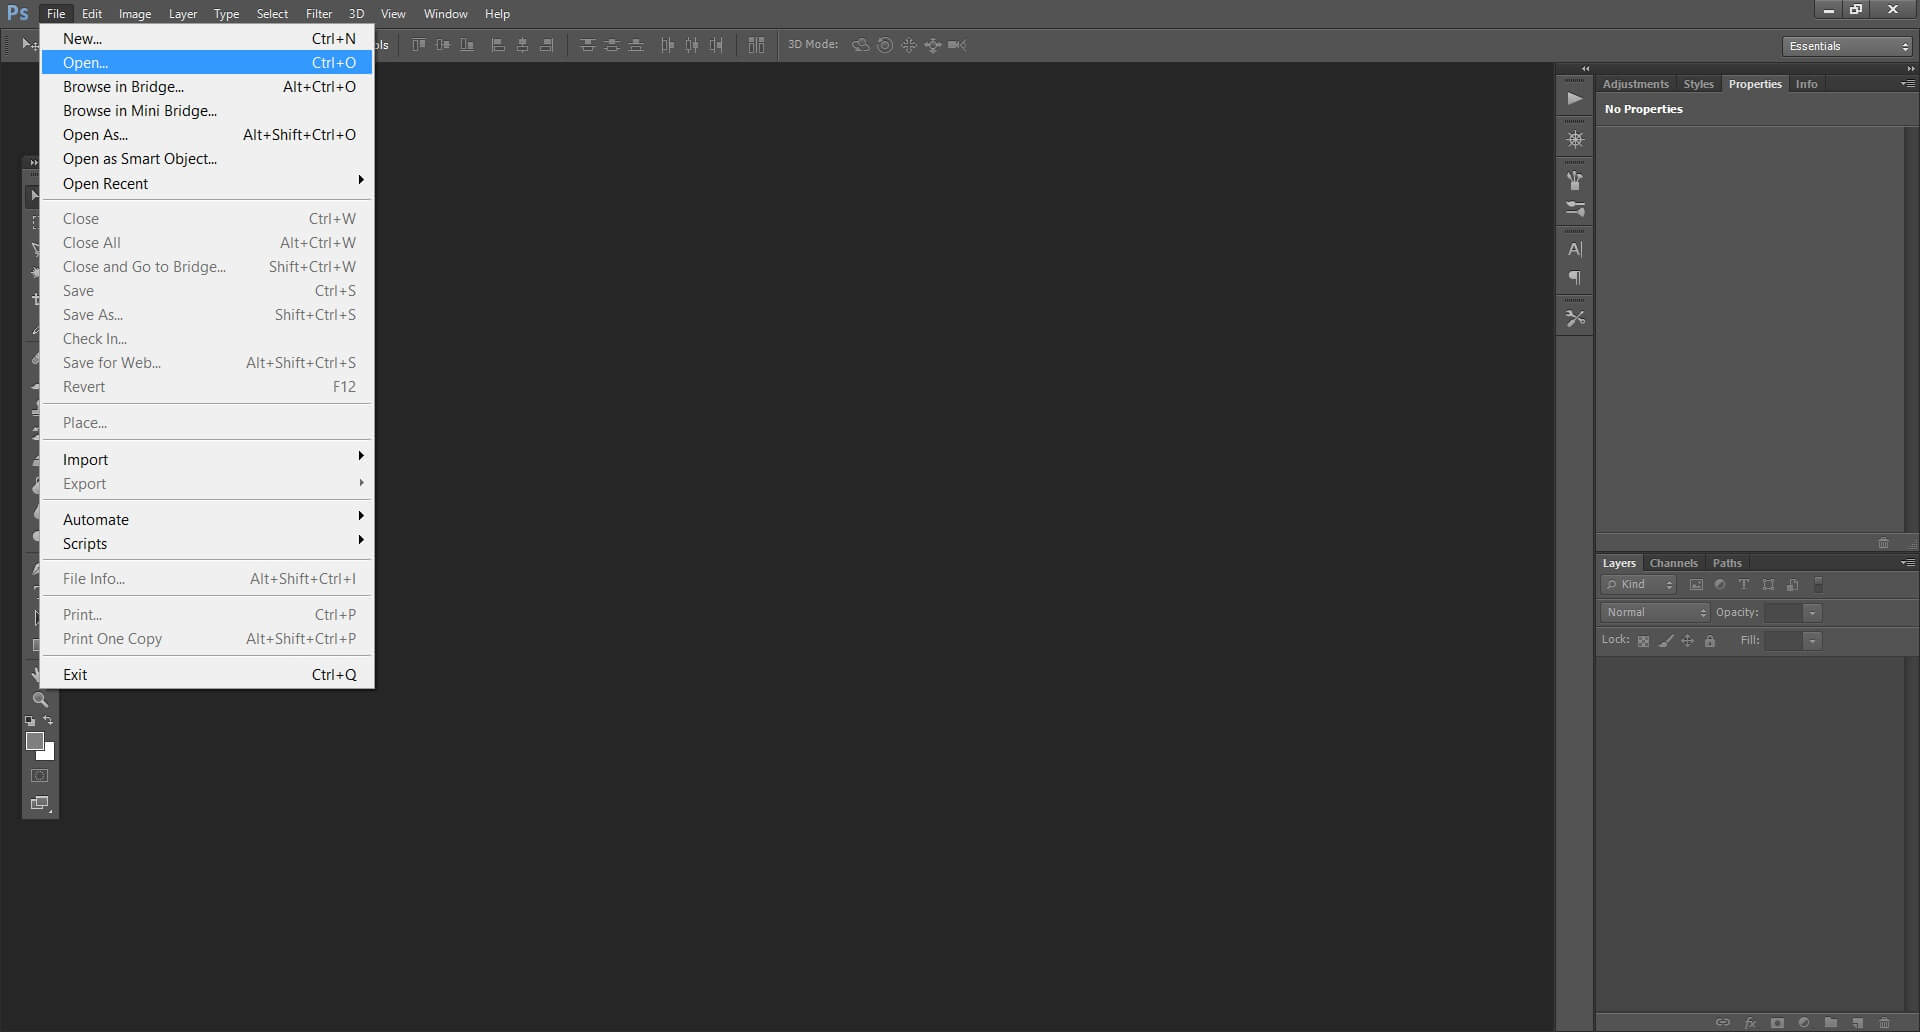
Step 3: Choose your cover file and click ‘Open’.
Step 4: Some of you may seem this window. It depends from the settings of your Photoshop. If you see it, just press ENTER or click ‘Open’. If you don’t, just go to the next step.
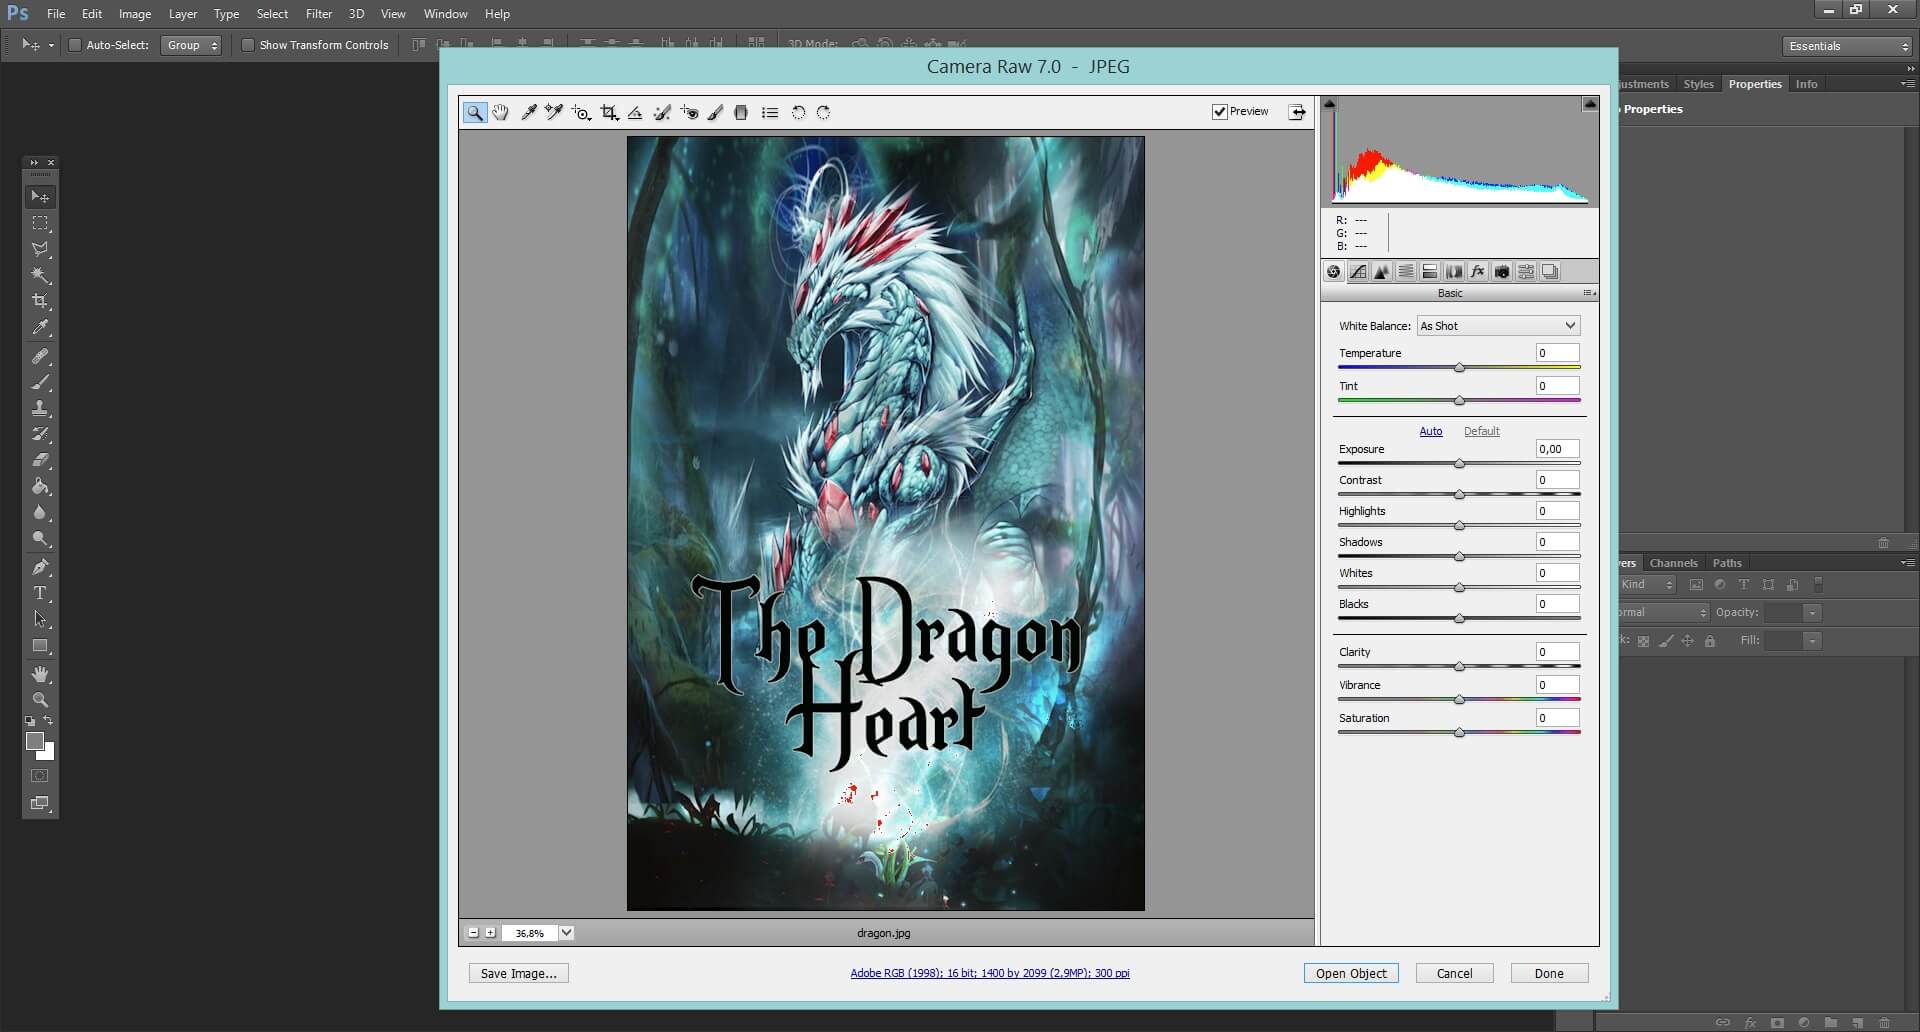
Step 5: That’s what you get.

Step 6: Now press Ctrl (Command) + Alt + I. If it doesn’t work go to Image-> Image size.
Step 7: In the window ‘Image Size’ make sure the option ‘Resample Image’ is checked.
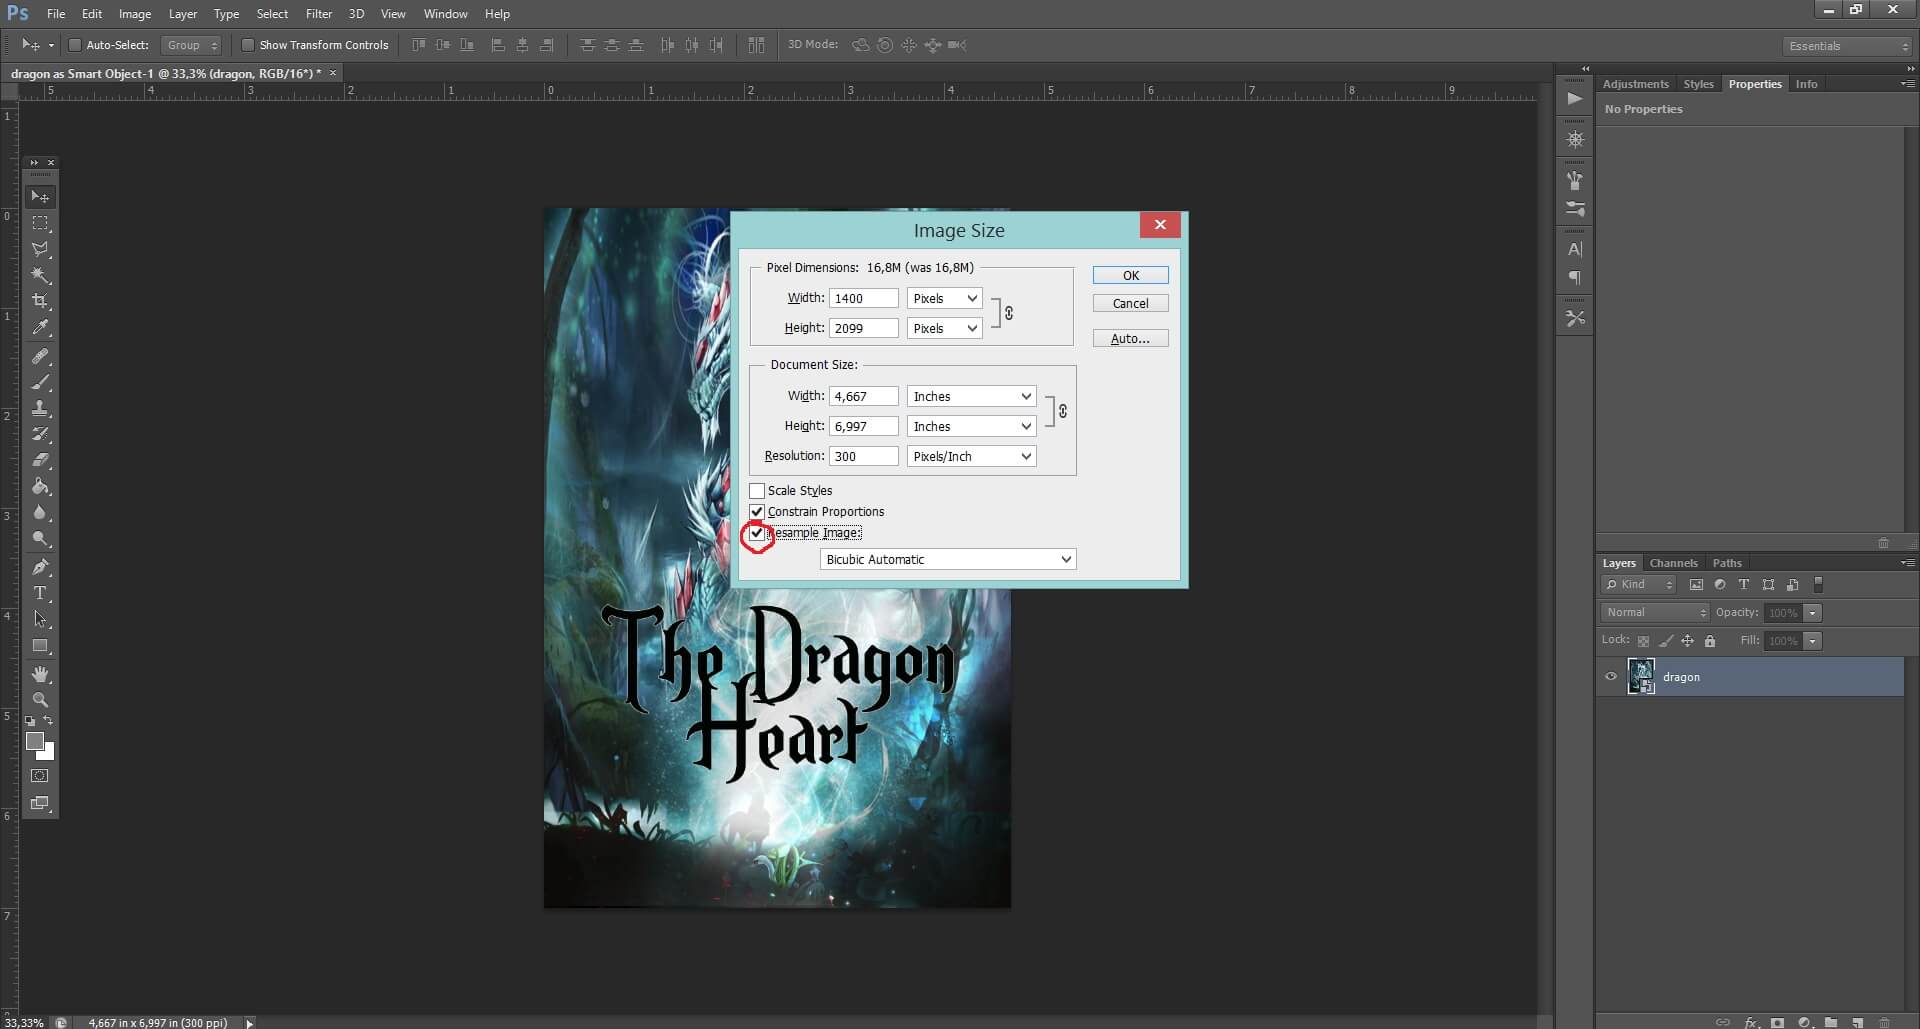
Step 8: Now uncheck ‘Constrain proportions’.
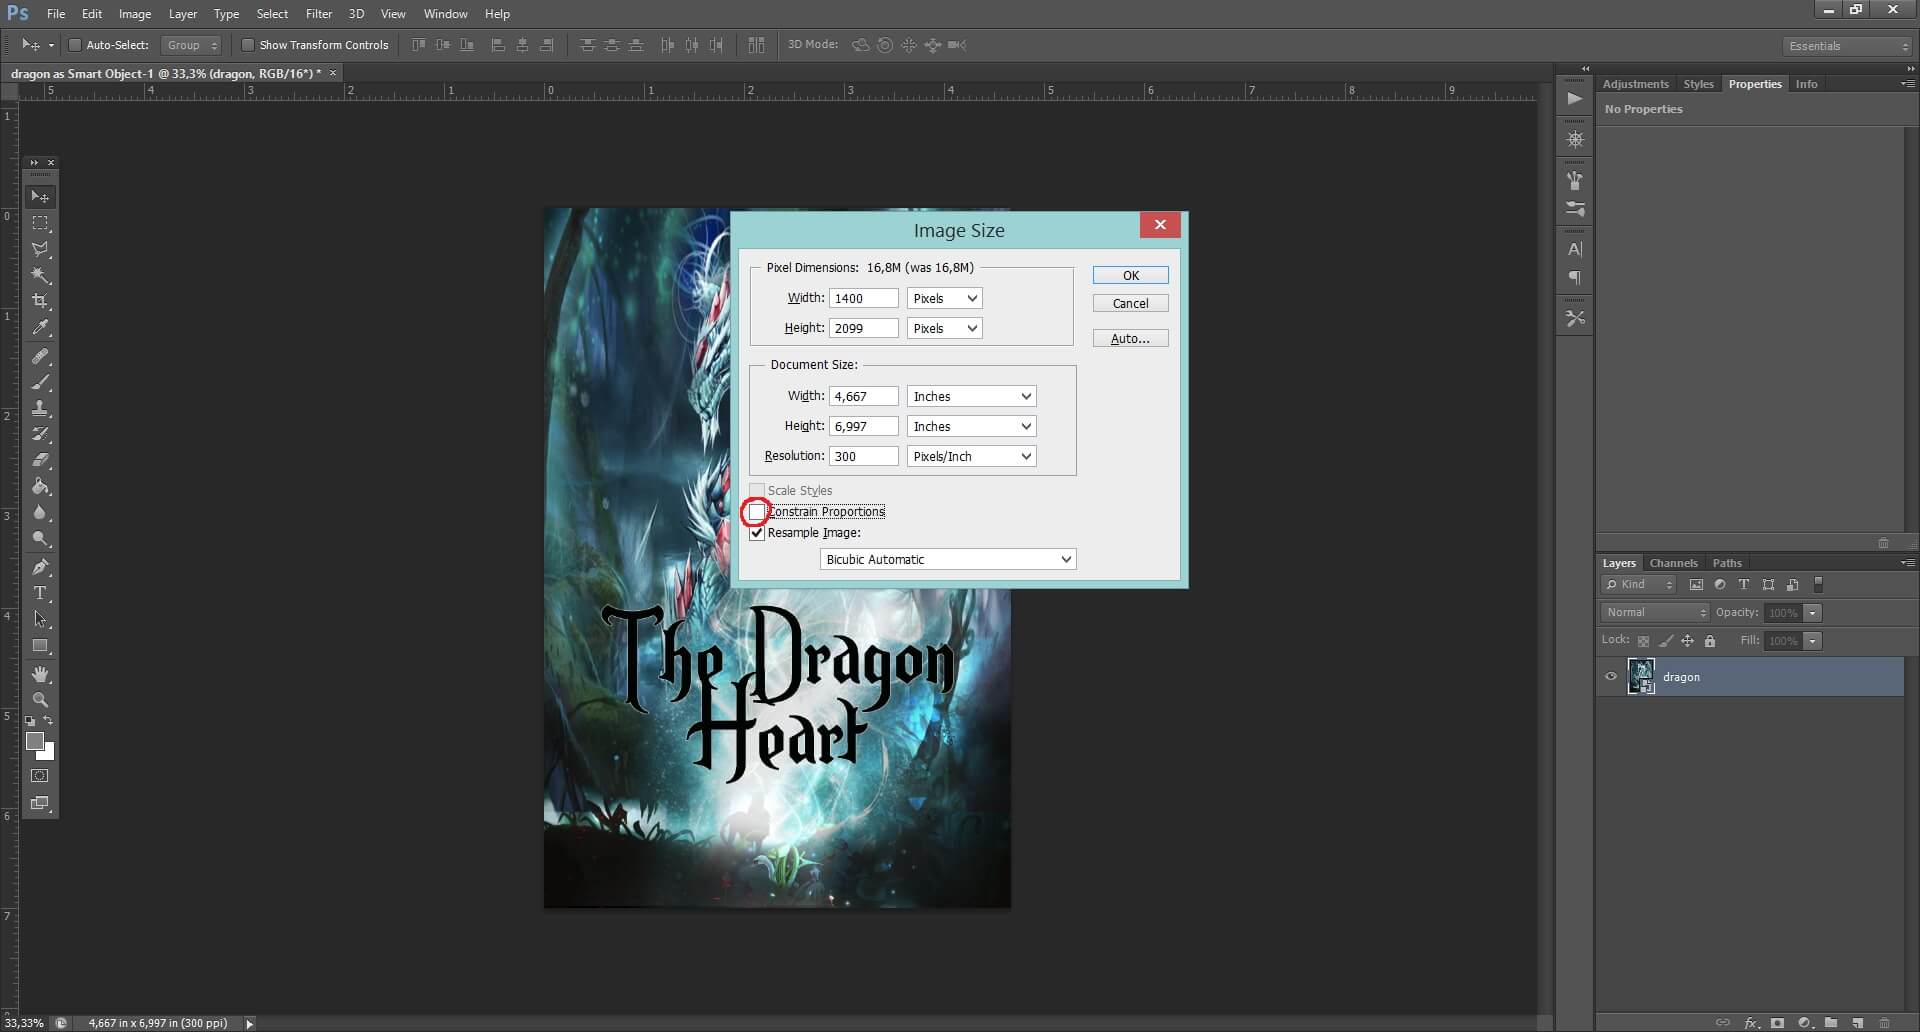
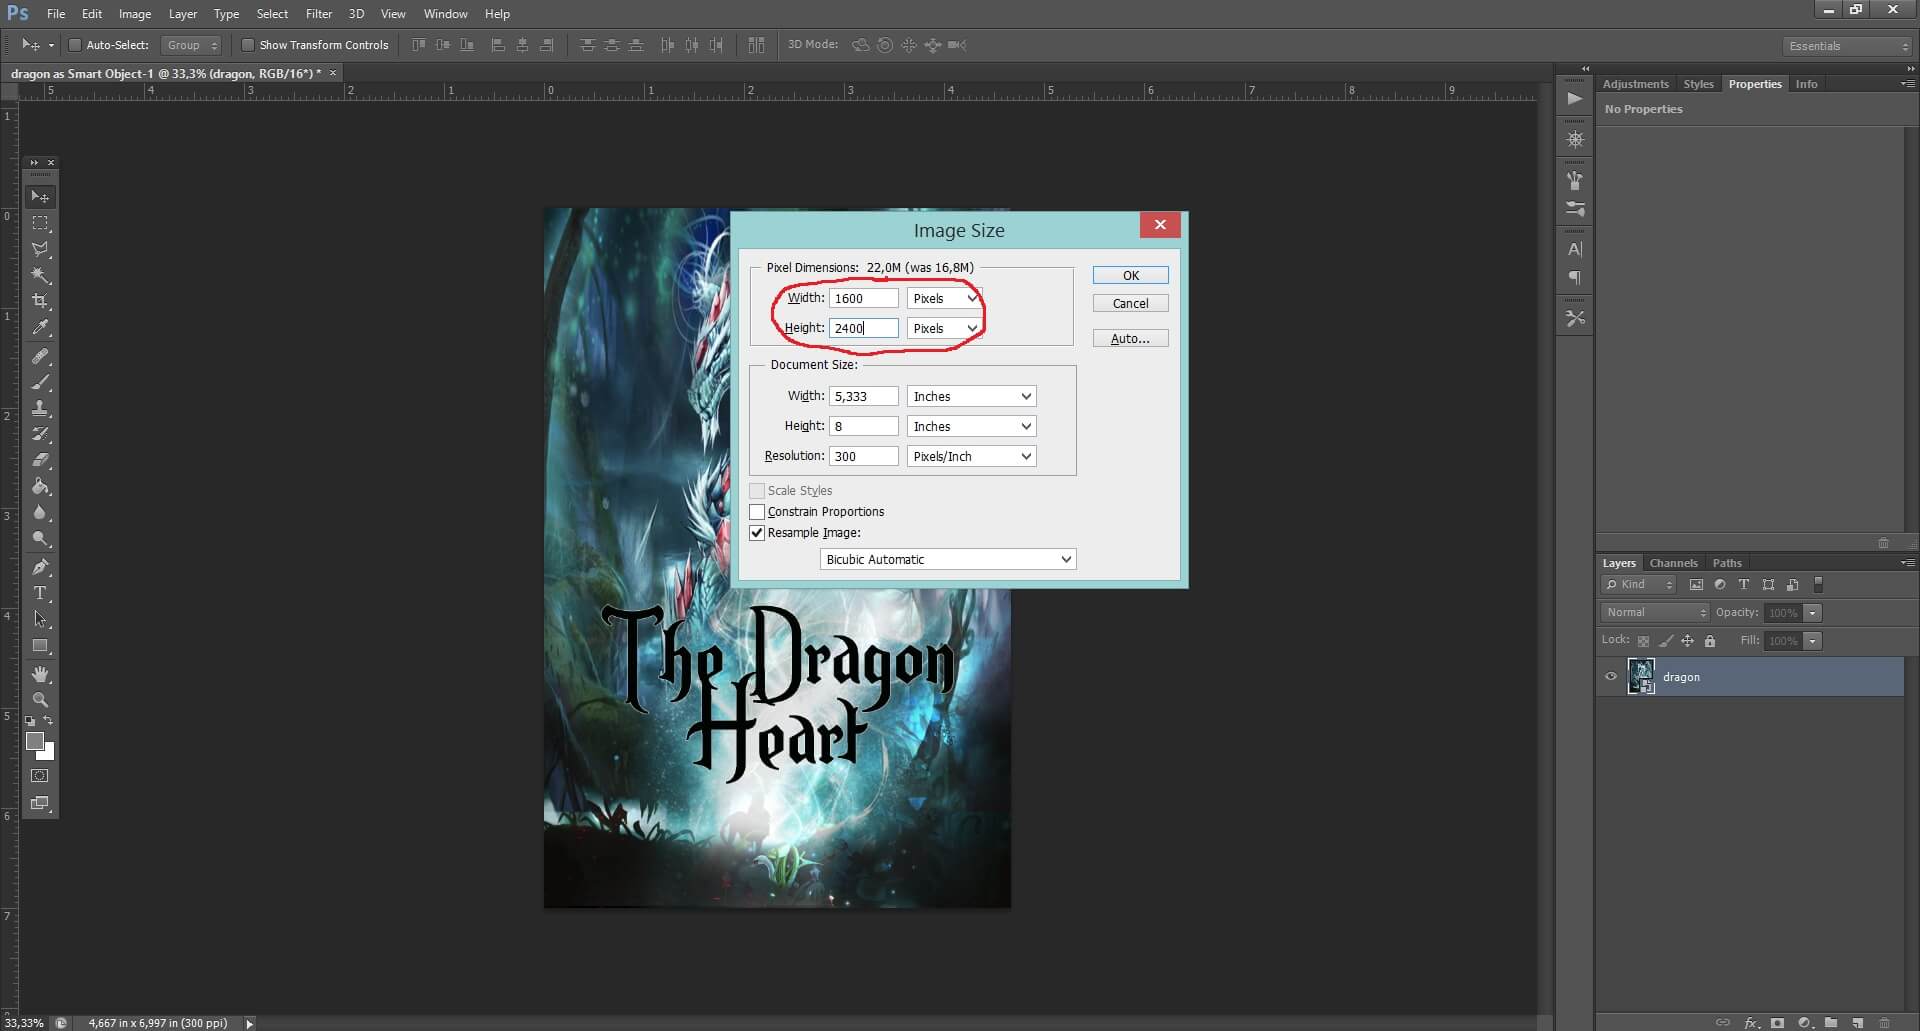
Step 9: Now set the dimensions you need. To make Booky’s actions work for your cover set the width to 1600 pixels and height to 2400 pixels. When you’re done, click OK.
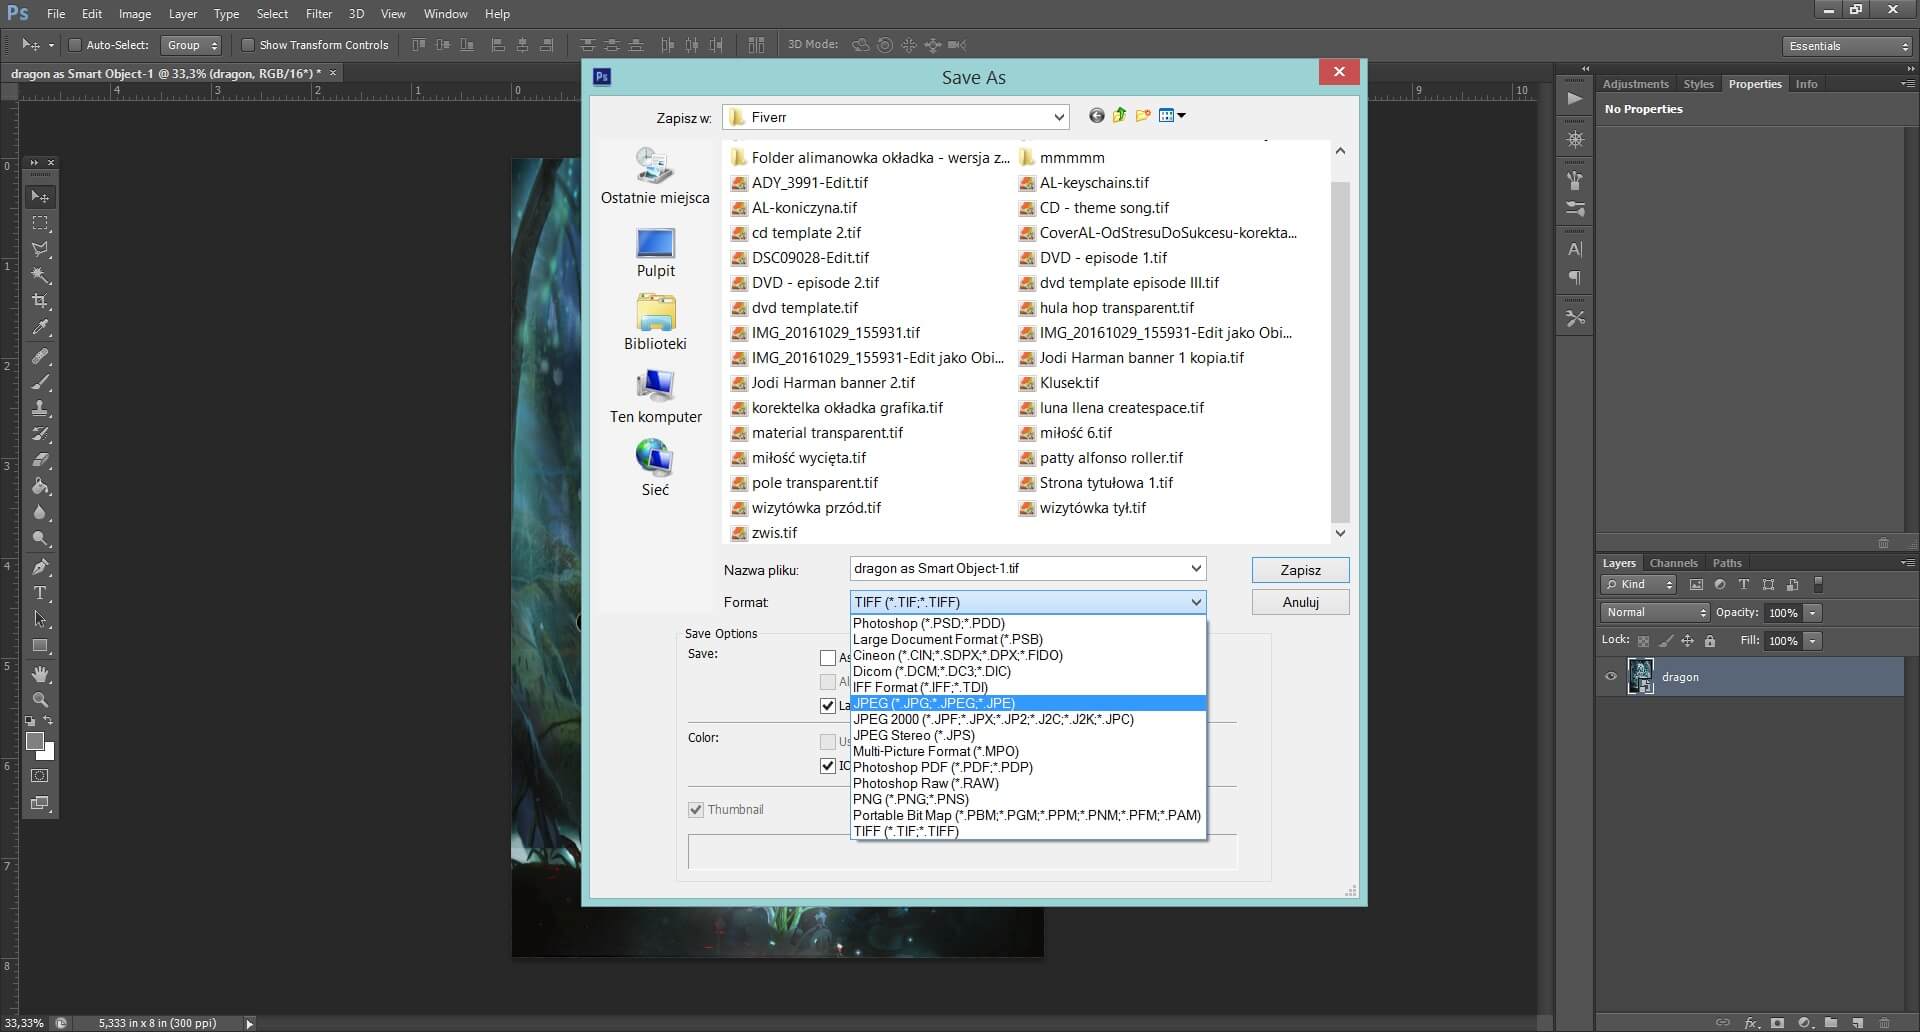
Step 10: Done! Now you have to save your work. Go to File-> Save As
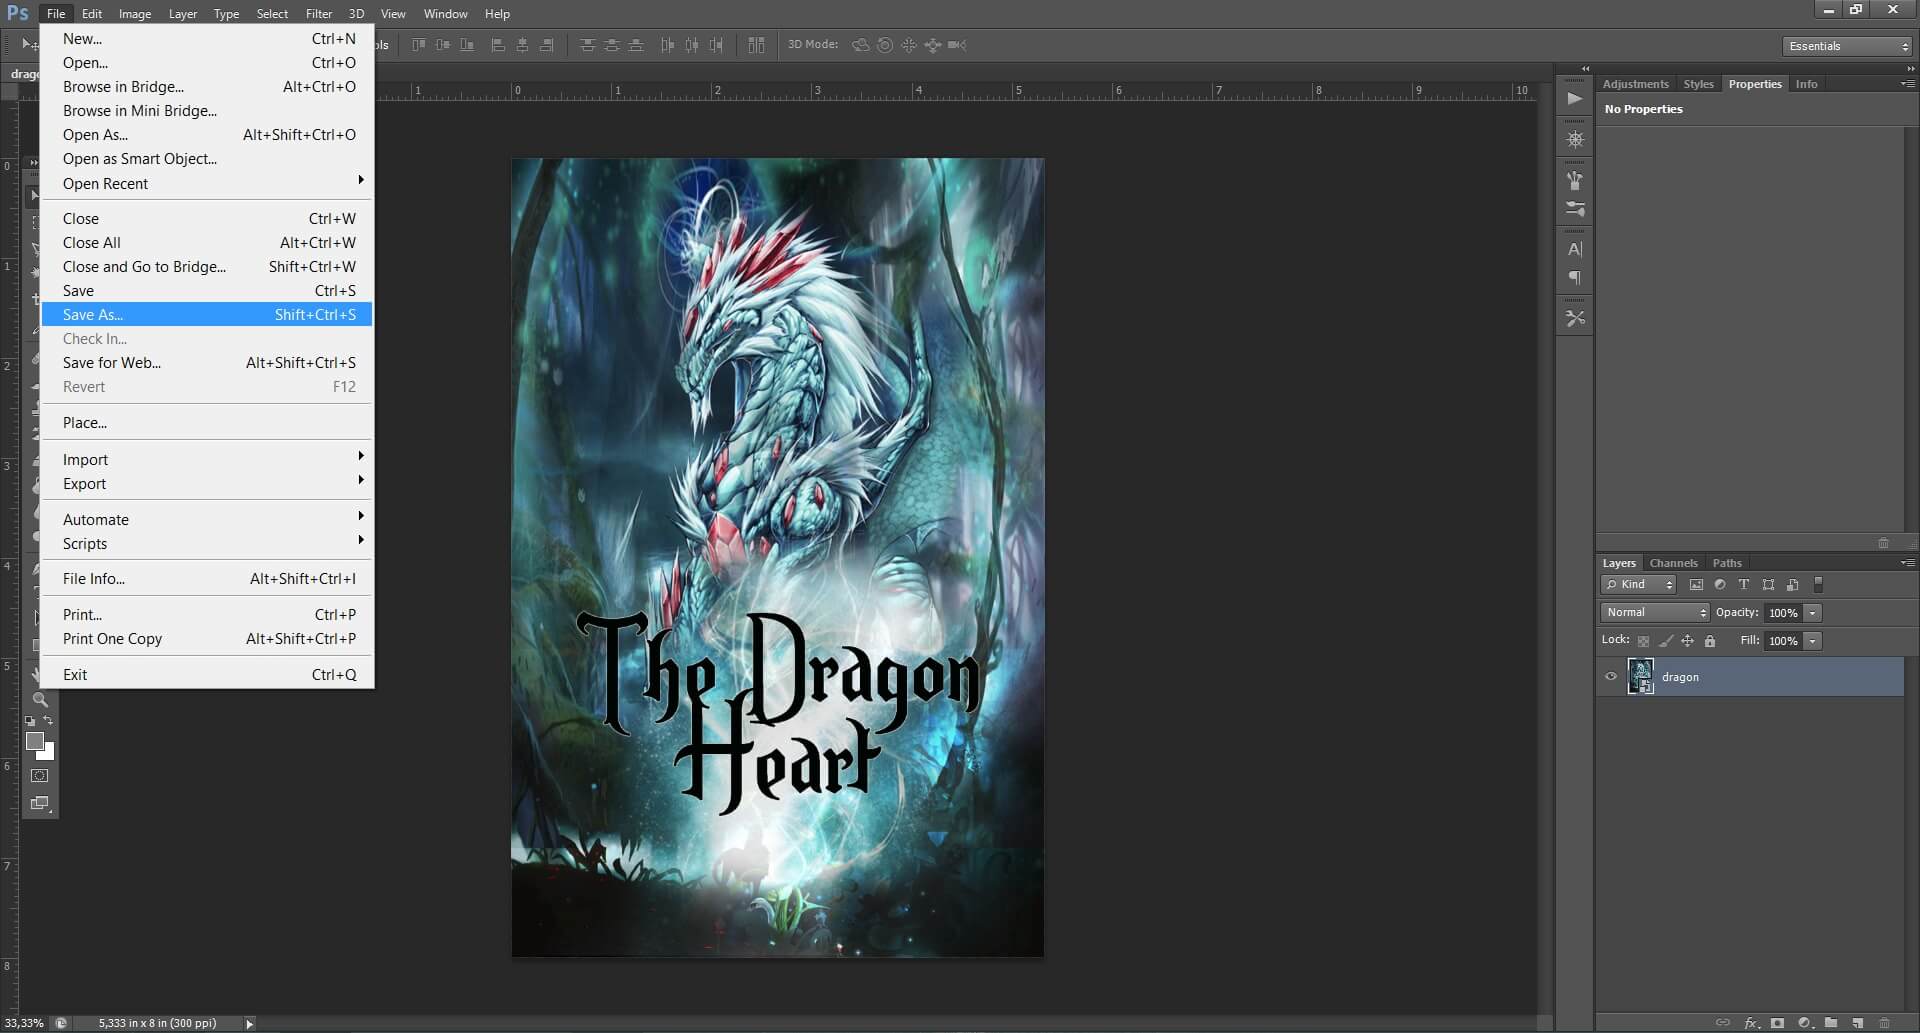
Step 11: Choose the format, folder and click SAVE. Usually jpg will be the format you need.
Congratulations! Your cover has the size you need!
If you have any questions or problems contact me via the contact form or let me know in the comments. I’ll do my best to help!
